
Wiki
Wiki
Filters
Filters
A filter shows a subset of your channels in the monitoring view. You can use filters to create different views for different purposes: a subset for a specific monitoring position, a subset for a line check, or any other combination you need.
Creating a filter
Click the Filters button in the toolbar to open the Filters dropdown.
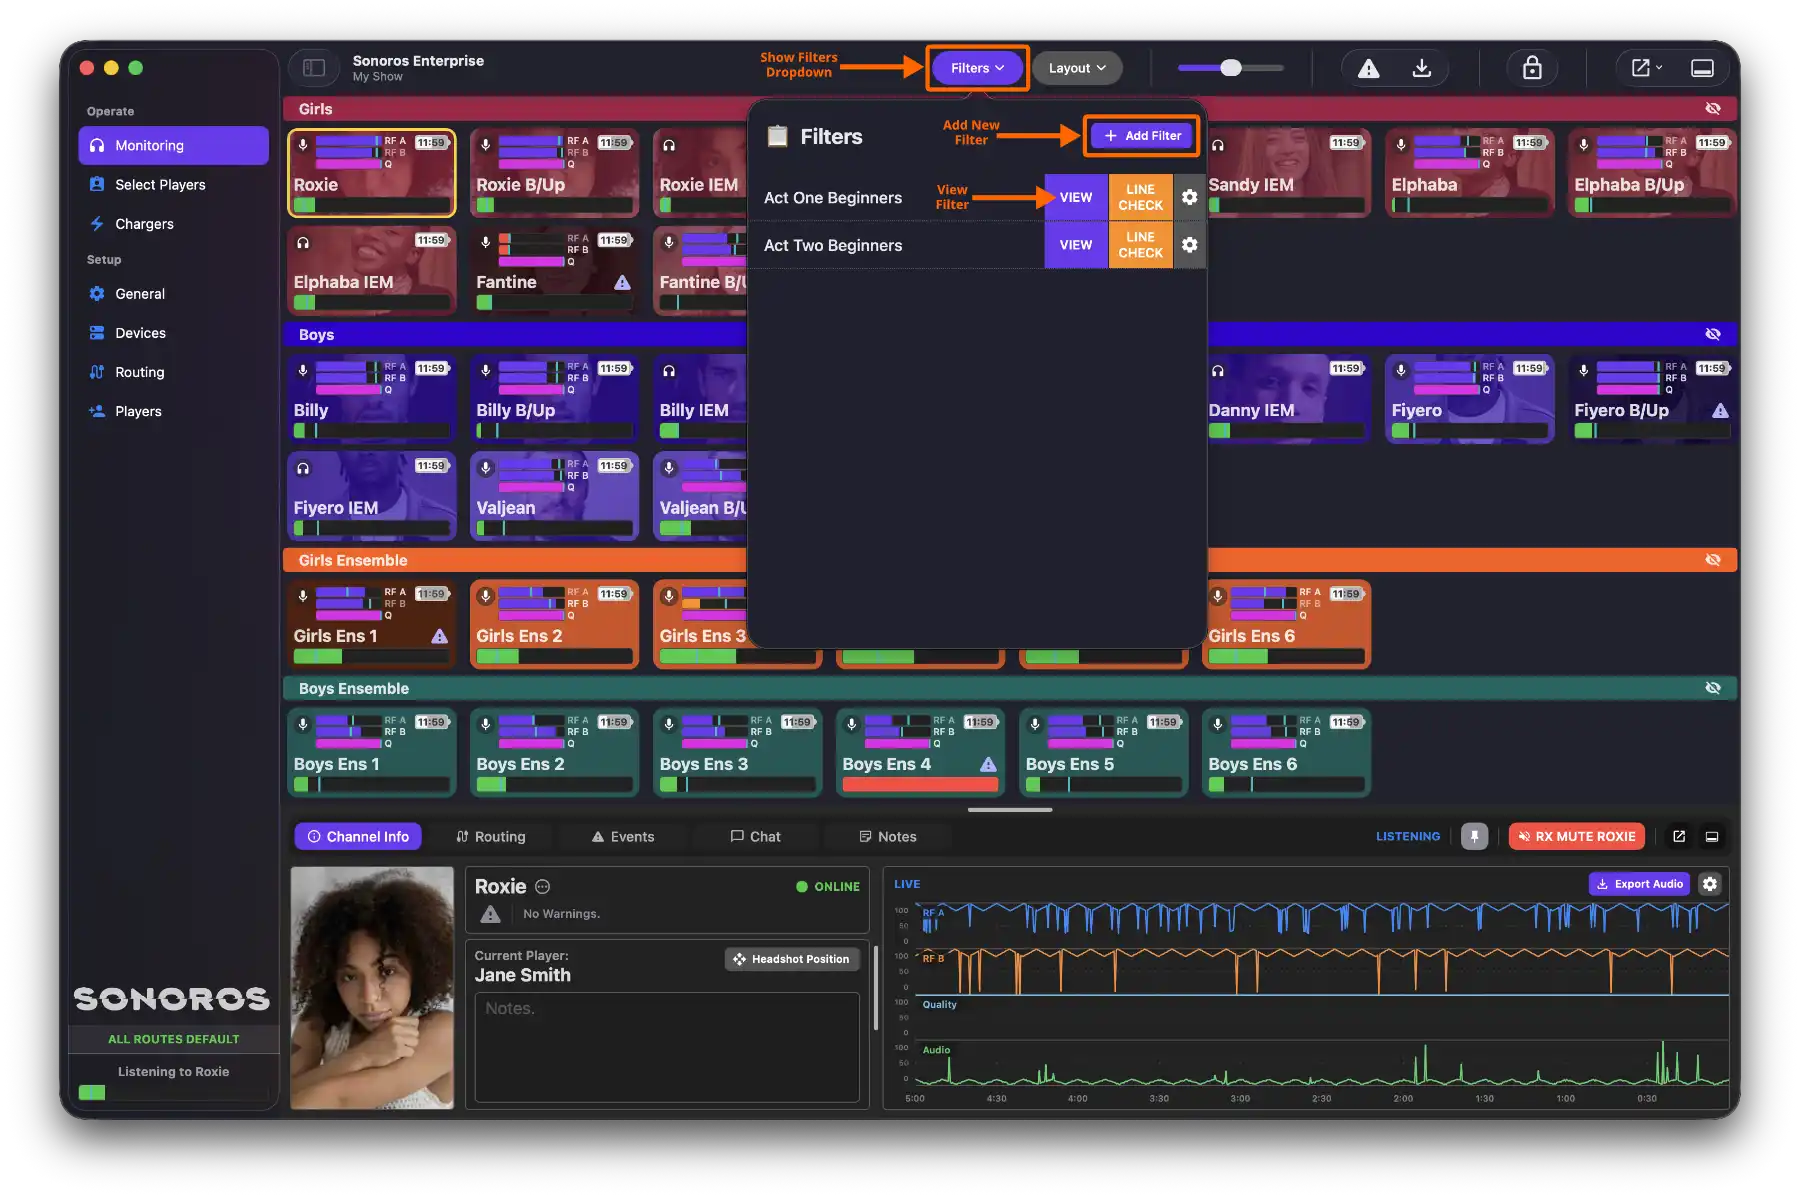
Click Add Filter. Set the filter name and choose which channels belong to it, then click Add Filter to confirm.
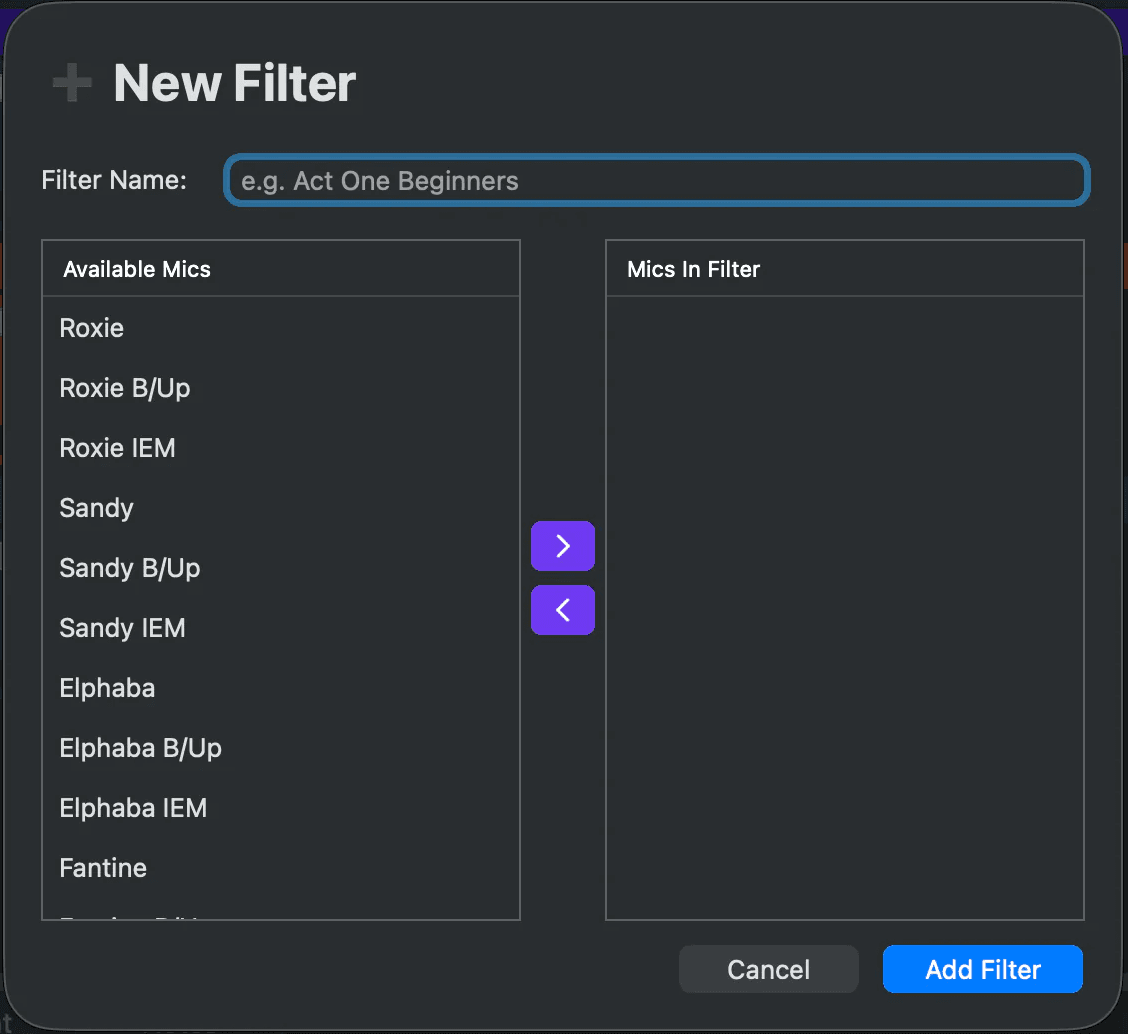
You can also add a filter from the Tools menu in the Mac menu bar.
Viewing a filter
In the Filters dropdown, click the View button next to a filter to apply it. The monitoring view updates to show only the channels in that filter, and a filter bar appears at the top showing the filter name.
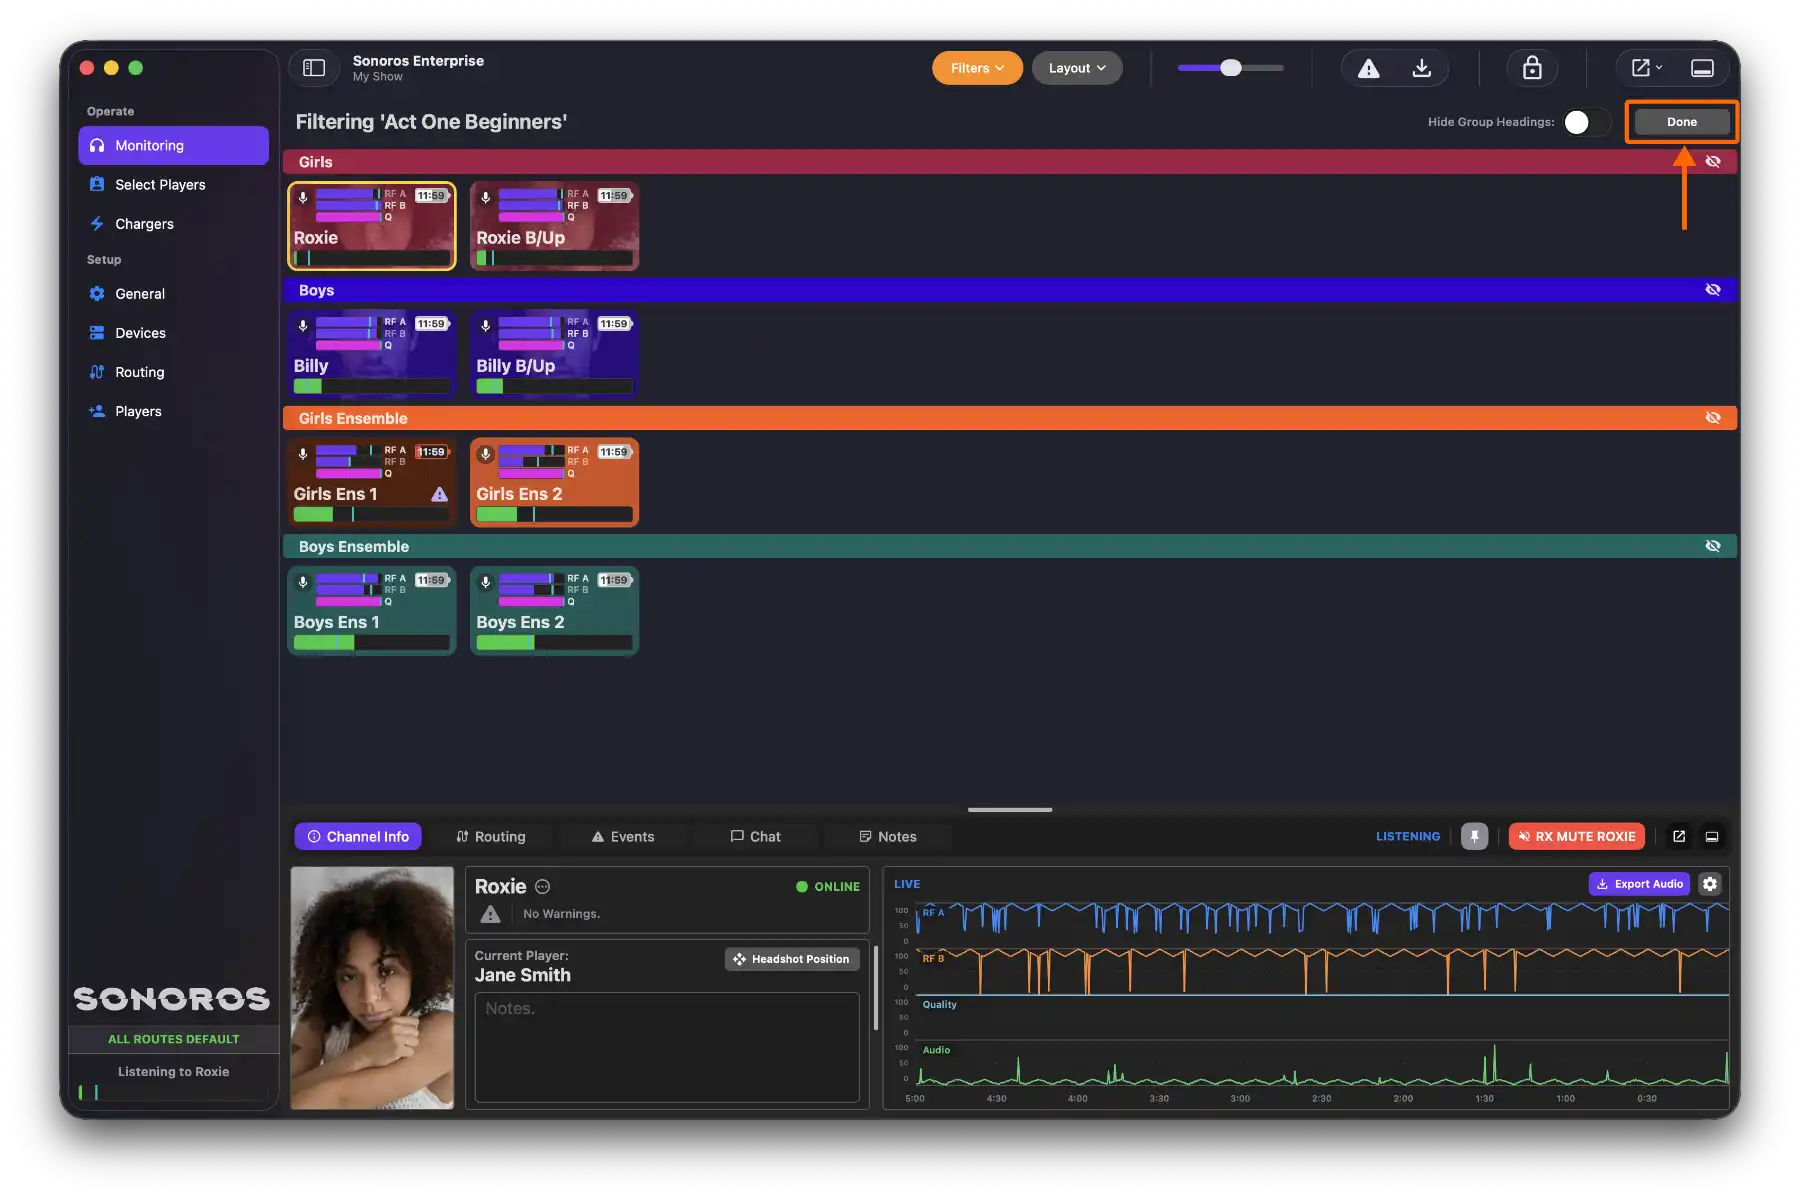
To clear the filter, click Done in the filter bar, or open the Filters dropdown and click the active filter's button again.
Group headings
When a filter is active, the filter bar includes a Hide Group Headings toggle. Turn it on to show channels as a flat list with custom ordering; turn it off to show channels organised within their groups and default ordering.

Editing and deleting a filter
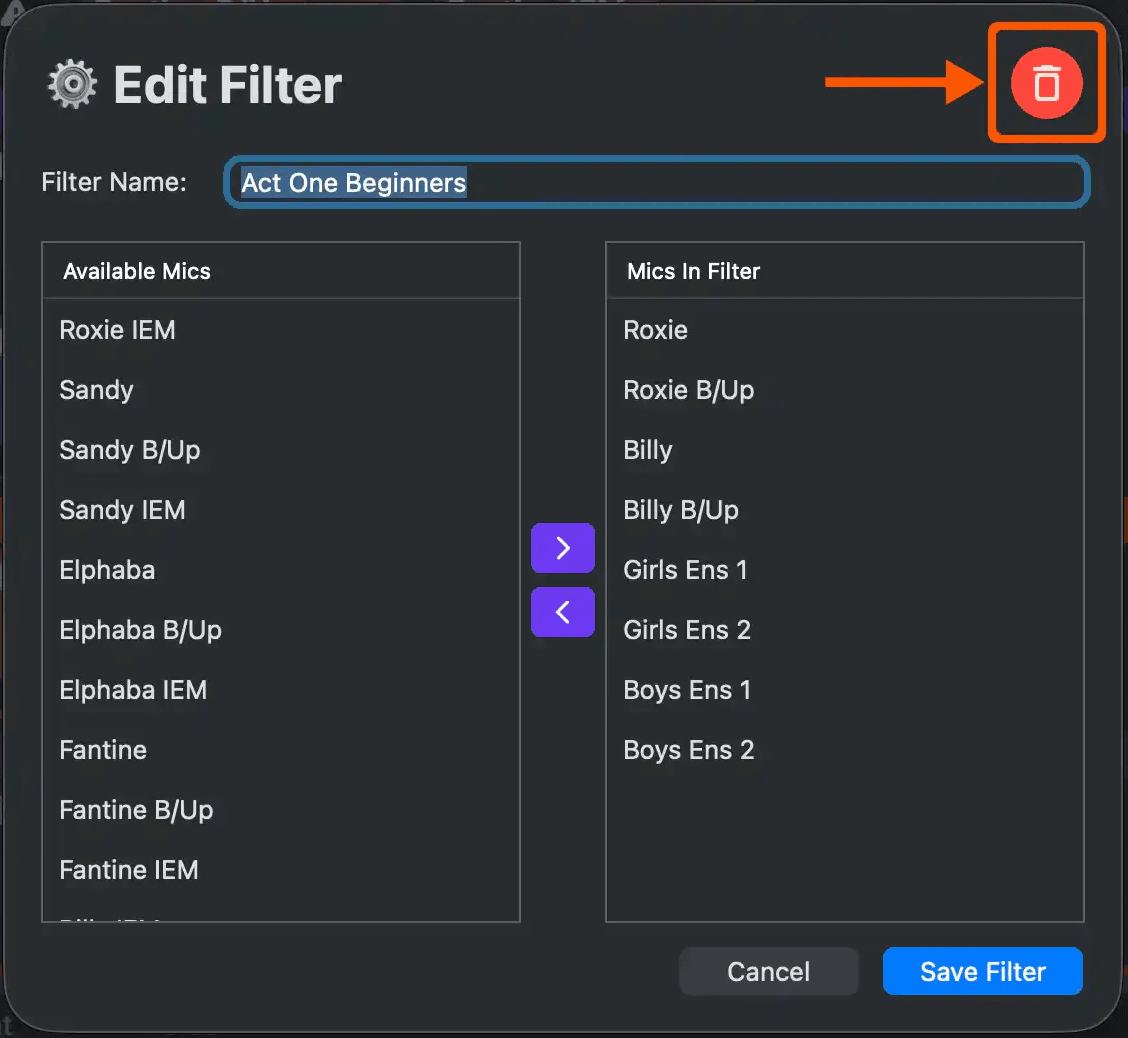
In the Filters dropdown, click the gear icon next to a filter to open its settings. This brings up the same sheet as when you created it, where you can change the name or channel selection. A delete button is also available here to remove the filter.
Mirroring filters to clients
On a client, open the Filters dropdown. Under Mirror from server, tick Filters to follow whatever filter is active on the server. When mirroring is on, the client's monitoring view will update whenever the filter changes on the server.

A filter shows a subset of your channels in the monitoring view. You can use filters to create different views for different purposes: a subset for a specific monitoring position, a subset for a line check, or any other combination you need.
Creating a filter
Click the Filters button in the toolbar to open the Filters dropdown.
Click Add Filter. Set the filter name and choose which channels belong to it, then click Add Filter to confirm.
You can also add a filter from the Tools menu in the Mac menu bar.
Viewing a filter
In the Filters dropdown, click the View button next to a filter to apply it. The monitoring view updates to show only the channels in that filter, and a filter bar appears at the top showing the filter name.
To clear the filter, click Done in the filter bar, or open the Filters dropdown and click the active filter's button again.
Group headings
When a filter is active, the filter bar includes a Hide Group Headings toggle. Turn it on to show channels as a flat list with custom ordering; turn it off to show channels organised within their groups and default ordering.
Editing and deleting a filter
In the Filters dropdown, click the gear icon next to a filter to open its settings. This brings up the same sheet as when you created it, where you can change the name or channel selection. A delete button is also available here to remove the filter.
Mirroring filters to clients
On a client, open the Filters dropdown. Under Mirror from server, tick Filters to follow whatever filter is active on the server. When mirroring is on, the client's monitoring view will update whenever the filter changes on the server.