
Wiki
Wiki
Setting Up a Routing Device
Setting Up a Routing Device
This article assumes you already have a show set up with Sonoros channels.
Connecting the routing device
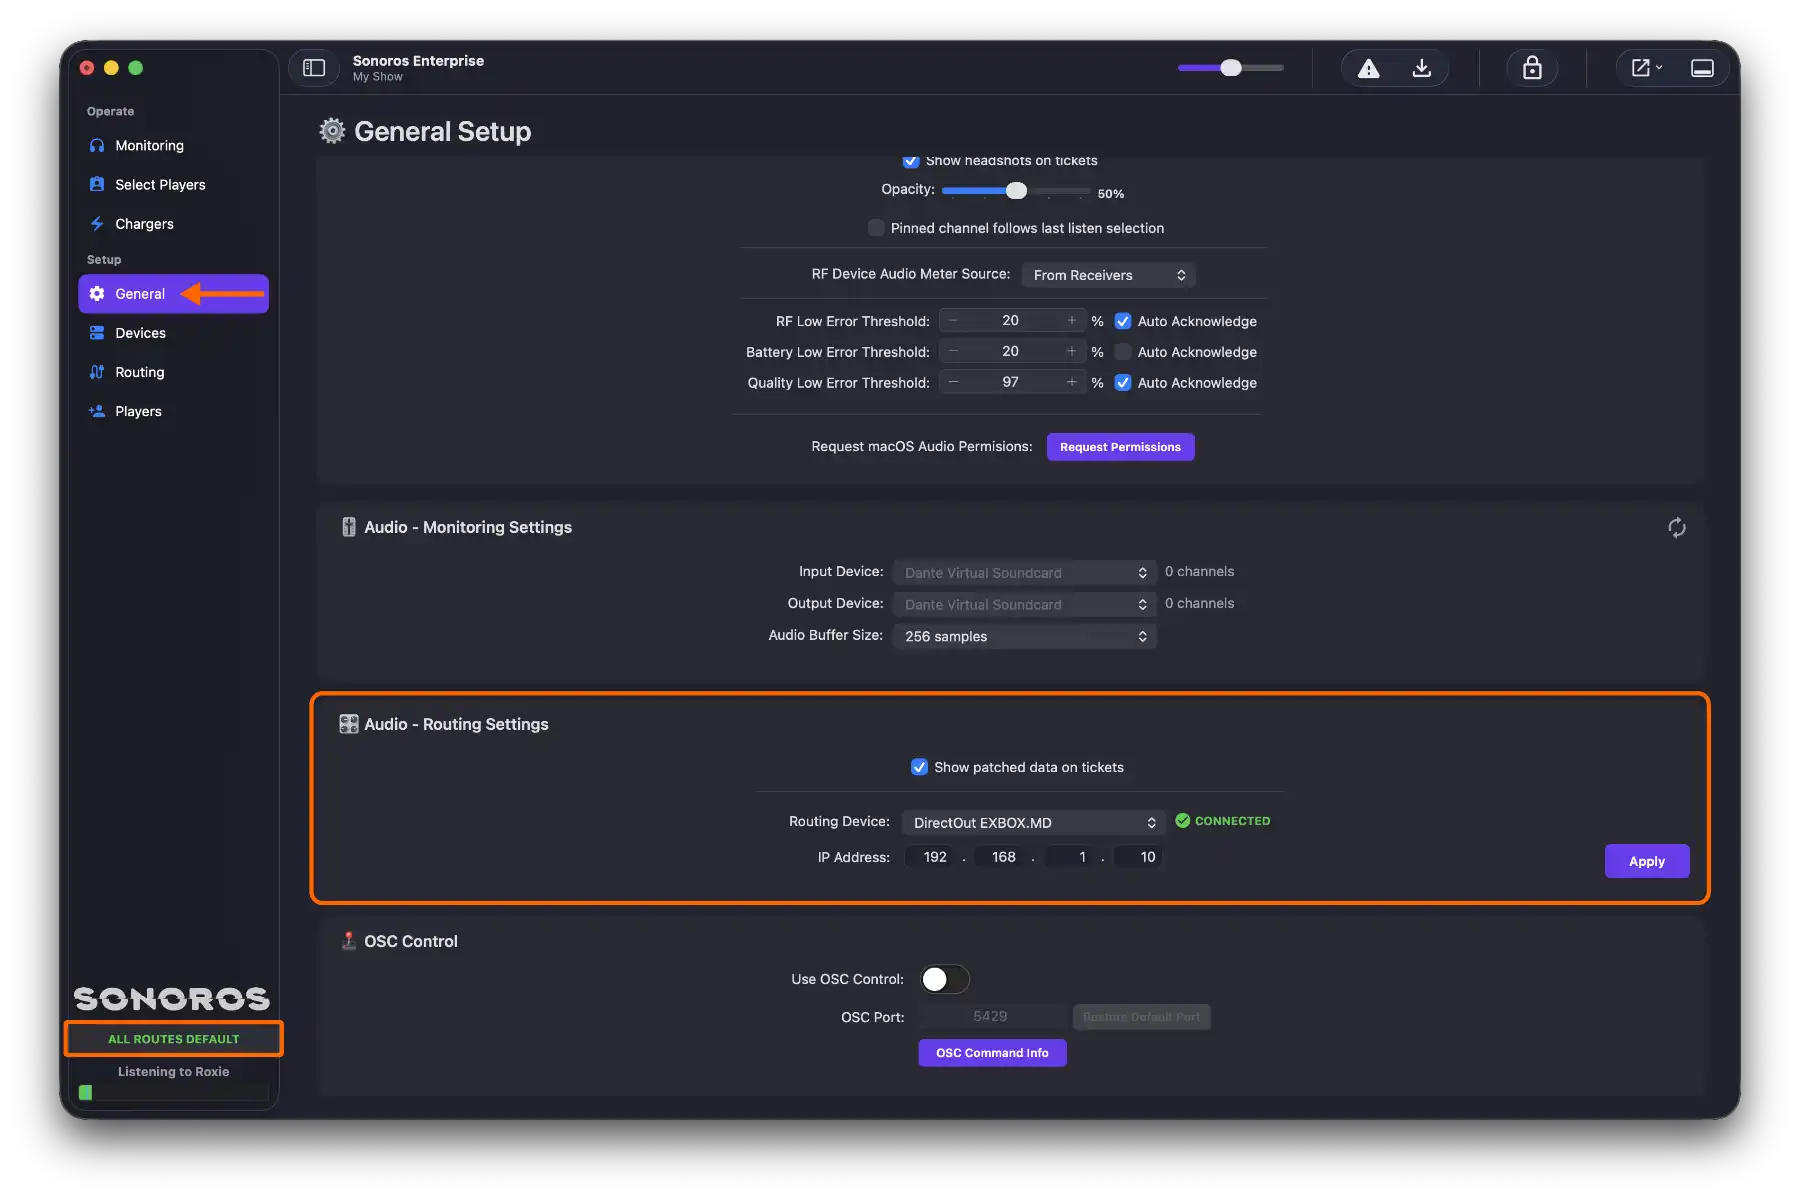
Go to Setup > General and find the Audio - Routing Settings section. Select your DirectOut device type from the dropdown.
USB devices connect directly to your Mac. Only one USB routing device can be connected at a time.
Ethernet devices require an IP address. Enter the IP address of the device and Sonoros will attempt to connect.
Once connecting, the sidebar shows CONNECTING TO DEVICE.... When the connection is established, it changes to ALL ROUTES DEFAULT in green.
Setting up your normalled routing
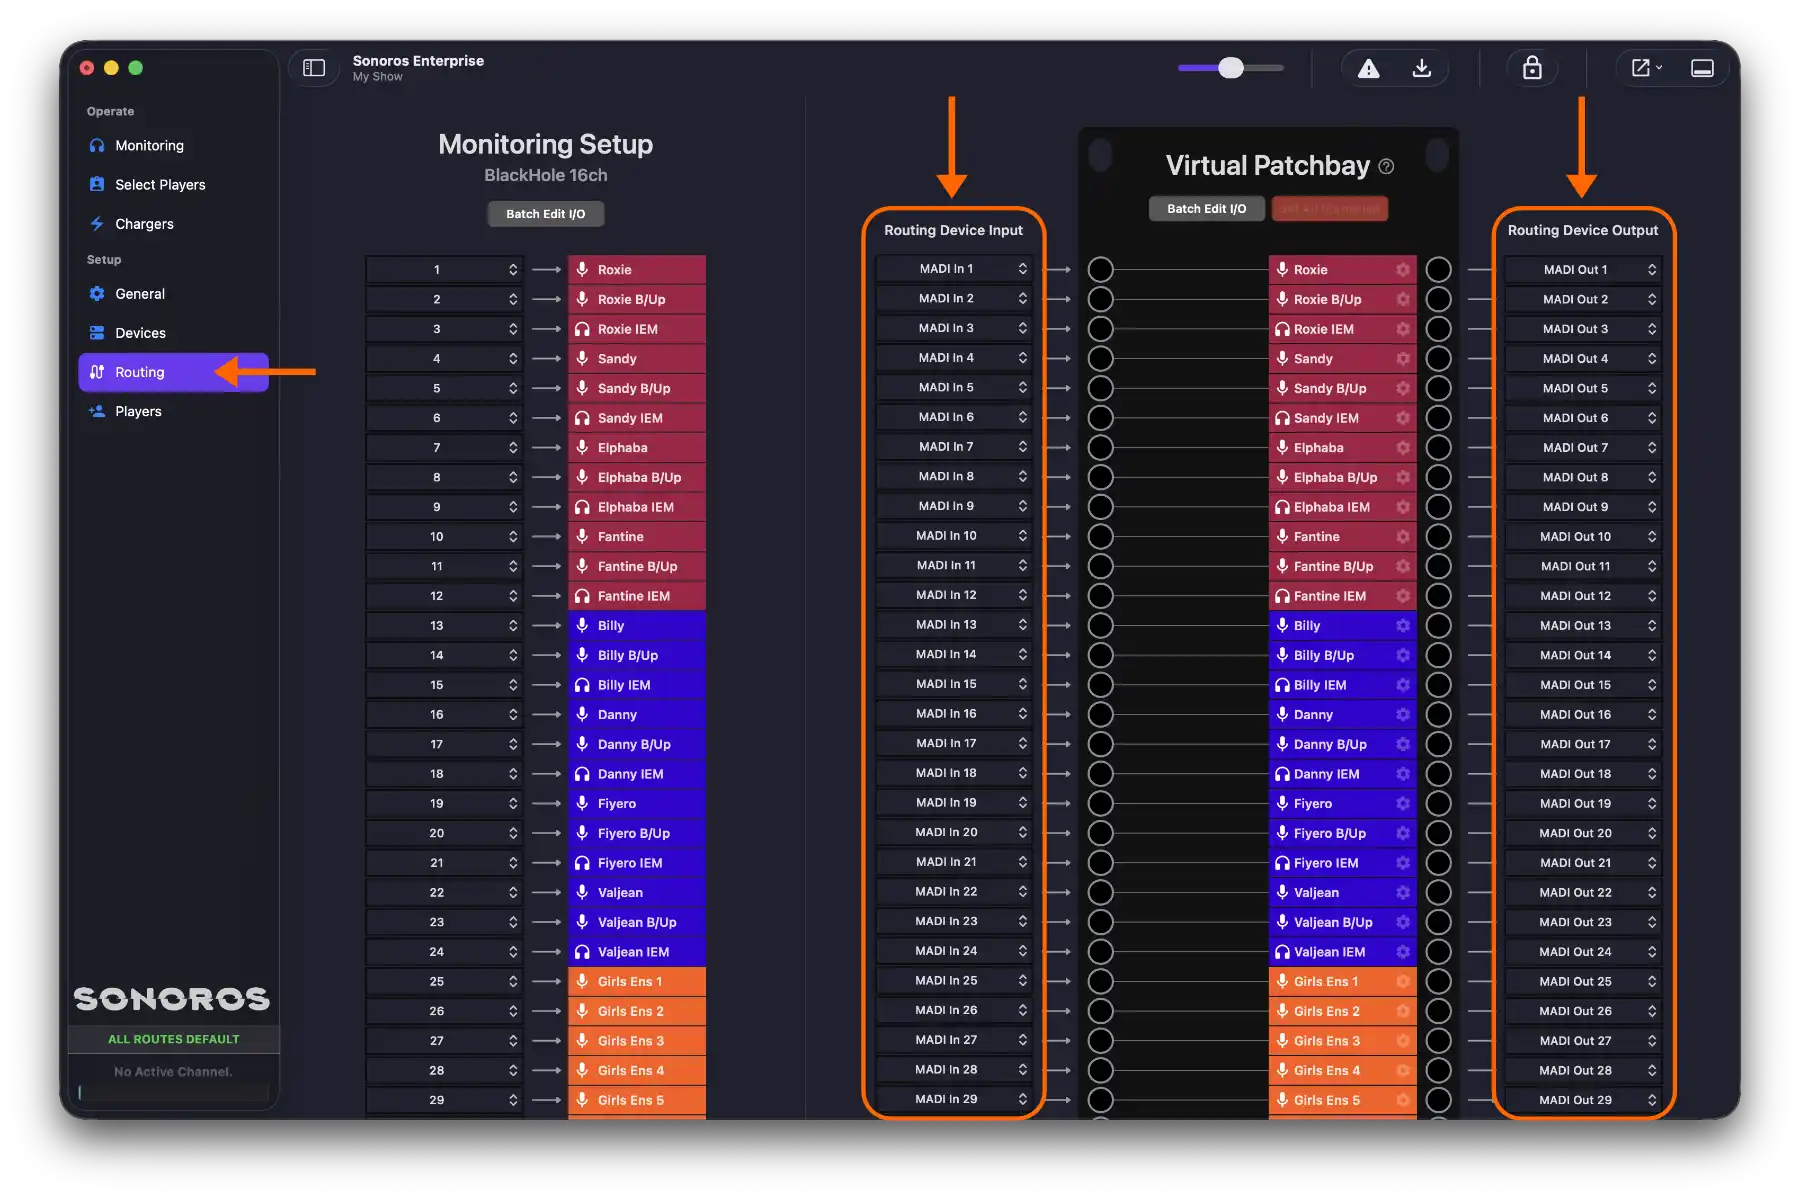
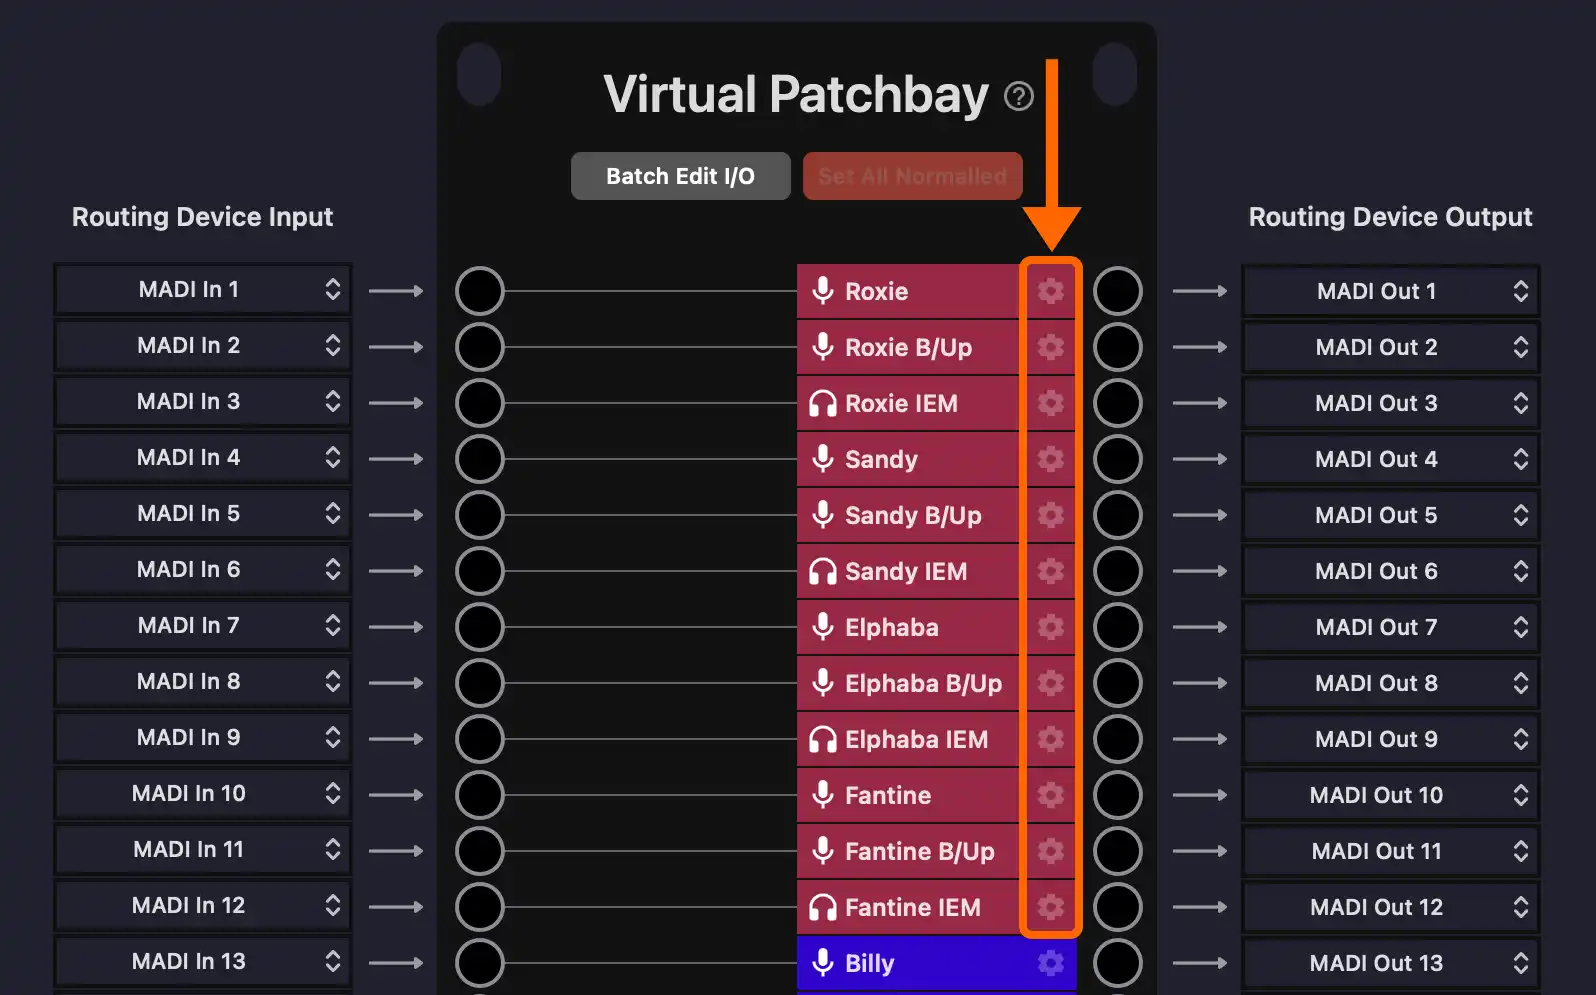
With the device connected, go to Setup > Routing. Each Sonoros channel has two columns: Routing Device Input and Routing Device Output. These represent the normalled route for that channel, meaning the signal path that should be in place by default.
Click the input or output field for a channel to associate that Sonoros channel with an audio channel on the routing device. This does not change the routing on the device itself, it tells Sonoros what the existing routing is, so it knows what "normalled" looks like. For a typical one-to-one setup, MADI input 1 maps to MADI output 1, MADI input 2 to MADI output 2, and so on.
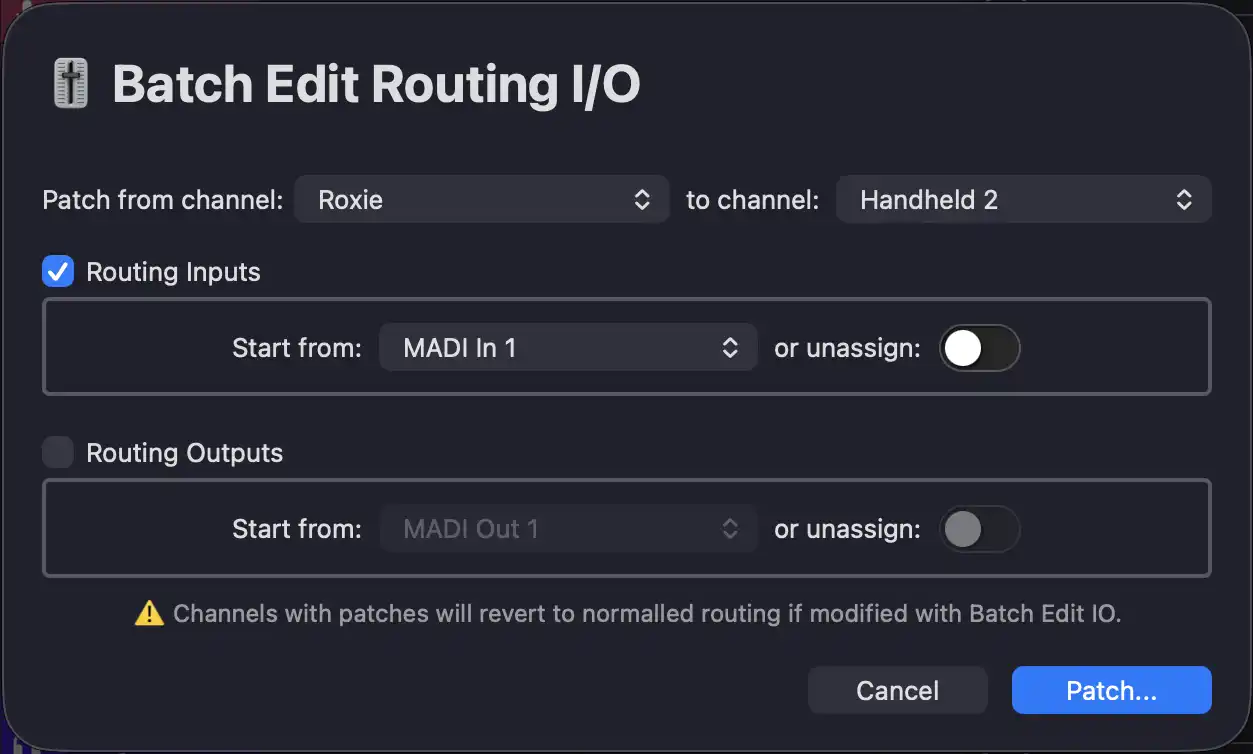
If your channels are in the same order as the routing device ports, use Batch Edit I/O to assign inputs and outputs across multiple channels at once rather than doing them one by one.
When all channels are assigned and the routing device reflects the normalled state, the sidebar shows ALL ROUTES DEFAULT. If the device's current routing does not match what you have told Sonoros to expect, it shows ROUTES OVERRIDDEN in red.

To verify everything is configured correctly, try a test patch. In the Virtual Patchbay, click an input circle on one channel and then an output circle on another. Sonoros will request this routing change from the device immediately. You can then check your routing device's own software to confirm the change took effect there. If it did, Sonoros is controlling the device correctly.
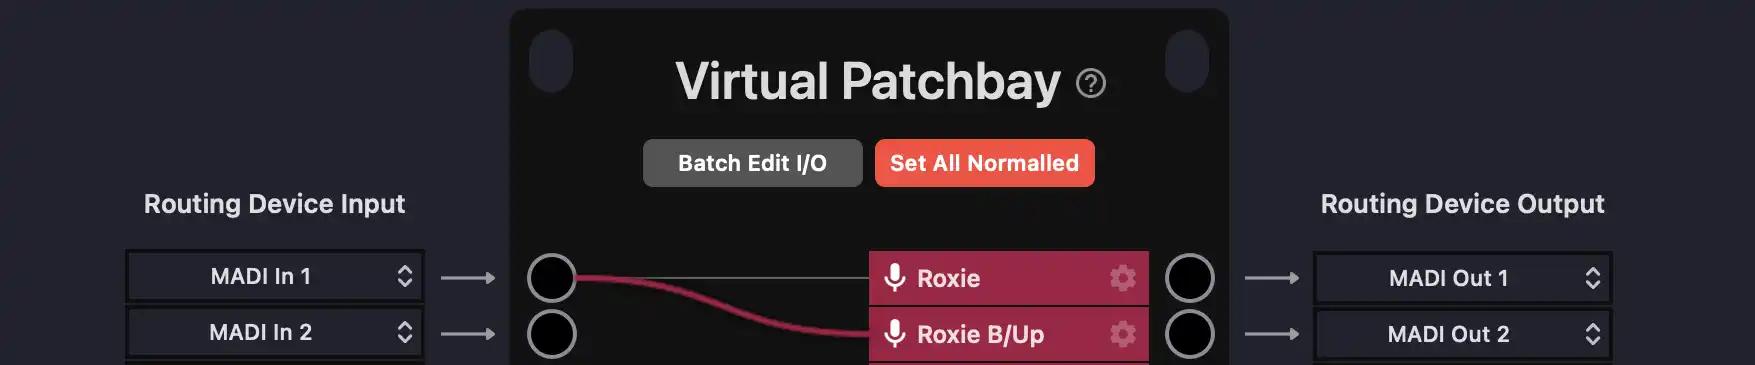
Set All Normalled
If you need to force the routing device back to the normalled state, click Set All Normalled. This removes all active patches and instructs the routing device to follow the normalled routing you have configured. This is most useful for resetting after a show, rather than during initial setup.
Spares and routing macros
Each channel has a settings button (gear icon, tooltip: Edit channel patch settings) that opens the Channel - Routing Settings panel.
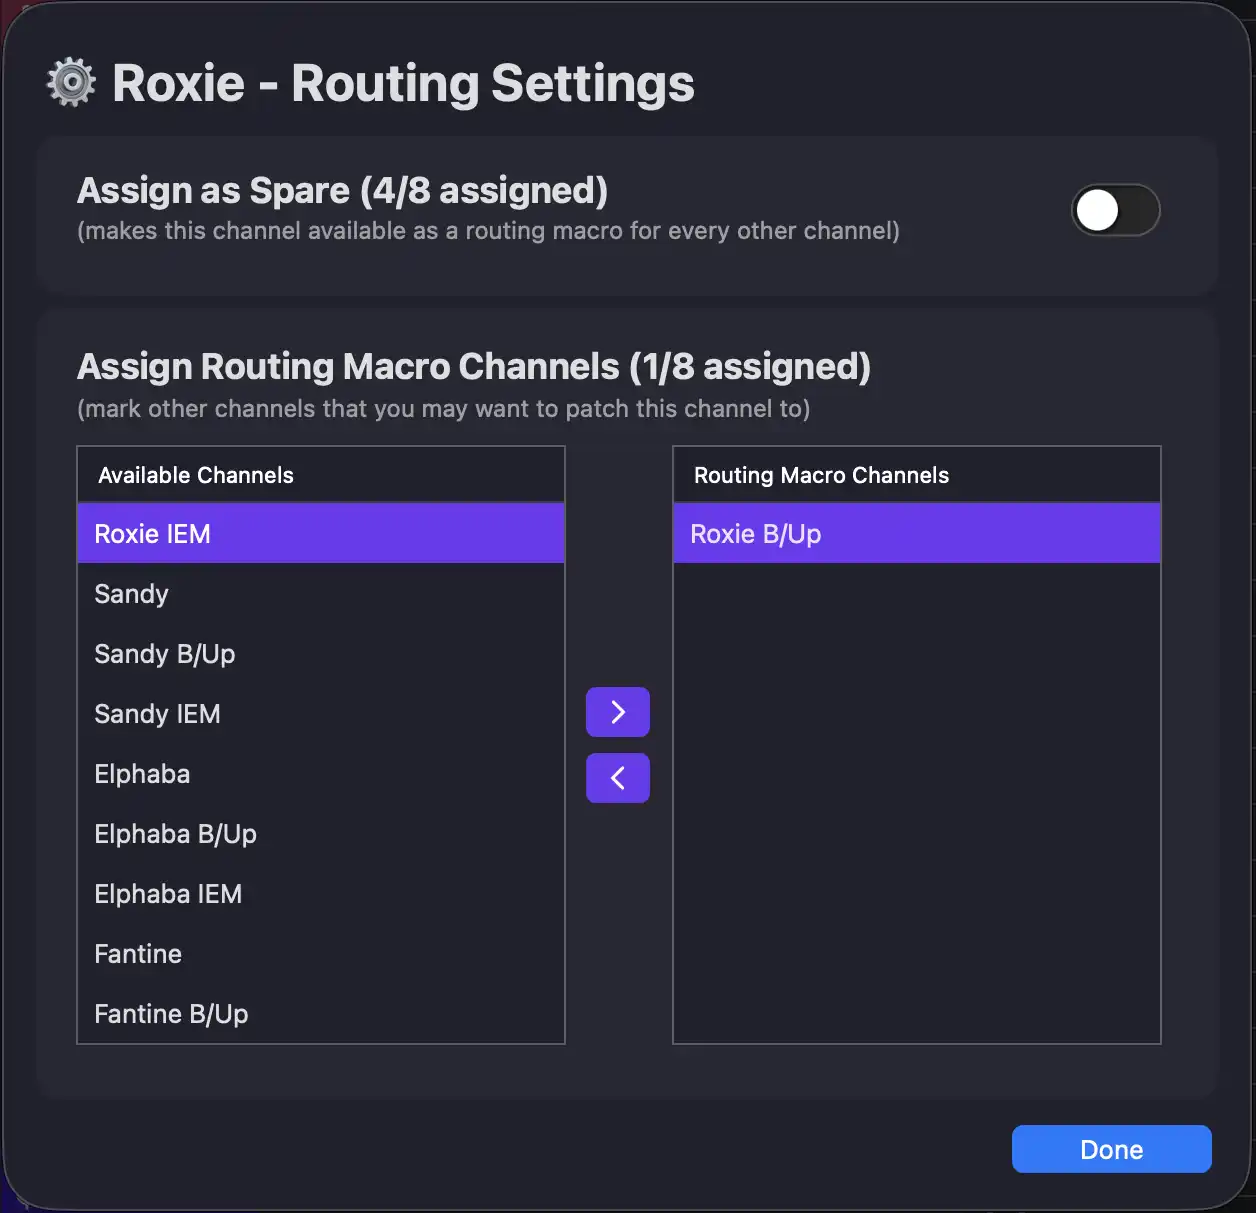
Here you can configure two types of quick-access routing override.
Routing macros are channel-specific shortcuts. Assign up to eight other channels as routing macros for this channel. They will appear on the channel's inspector in the monitoring view, letting you quickly patch over to a different source during a show.
Spares are global shortcuts available across all channels. Toggle Assign as Spare to add this channel to the global spares list, which can hold up to eight channels. Any channel's inspector can use the spare list to patch over to a spare at any time.
It is worth setting these up before the show so they are ready to use when you need them.
This article assumes you already have a show set up with Sonoros channels.
Connecting the routing device
Go to Setup > General and find the Audio - Routing Settings section. Select your DirectOut device type from the dropdown.
USB devices connect directly to your Mac. Only one USB routing device can be connected at a time.
Ethernet devices require an IP address. Enter the IP address of the device and Sonoros will attempt to connect.
Once connecting, the sidebar shows CONNECTING TO DEVICE.... When the connection is established, it changes to ALL ROUTES DEFAULT in green.
Setting up your normalled routing
With the device connected, go to Setup > Routing. Each Sonoros channel has two columns: Routing Device Input and Routing Device Output. These represent the normalled route for that channel, meaning the signal path that should be in place by default.
Click the input or output field for a channel to associate that Sonoros channel with an audio channel on the routing device. This does not change the routing on the device itself, it tells Sonoros what the existing routing is, so it knows what "normalled" looks like. For a typical one-to-one setup, MADI input 1 maps to MADI output 1, MADI input 2 to MADI output 2, and so on.
If your channels are in the same order as the routing device ports, use Batch Edit I/O to assign inputs and outputs across multiple channels at once rather than doing them one by one.
When all channels are assigned and the routing device reflects the normalled state, the sidebar shows ALL ROUTES DEFAULT. If the device's current routing does not match what you have told Sonoros to expect, it shows ROUTES OVERRIDDEN in red.
To verify everything is configured correctly, try a test patch. In the Virtual Patchbay, click an input circle on one channel and then an output circle on another. Sonoros will request this routing change from the device immediately. You can then check your routing device's own software to confirm the change took effect there. If it did, Sonoros is controlling the device correctly.
Set All Normalled
If you need to force the routing device back to the normalled state, click Set All Normalled. This removes all active patches and instructs the routing device to follow the normalled routing you have configured. This is most useful for resetting after a show, rather than during initial setup.
Spares and routing macros
Each channel has a settings button (gear icon, tooltip: Edit channel patch settings) that opens the Channel - Routing Settings panel.
Here you can configure two types of quick-access routing override.
Routing macros are channel-specific shortcuts. Assign up to eight other channels as routing macros for this channel. They will appear on the channel's inspector in the monitoring view, letting you quickly patch over to a different source during a show.
Spares are global shortcuts available across all channels. Toggle Assign as Spare to add this channel to the global spares list, which can hold up to eight channels. Any channel's inspector can use the spare list to patch over to a spare at any time.
It is worth setting these up before the show so they are ready to use when you need them.