
Wiki
Wiki
Chat
Chat
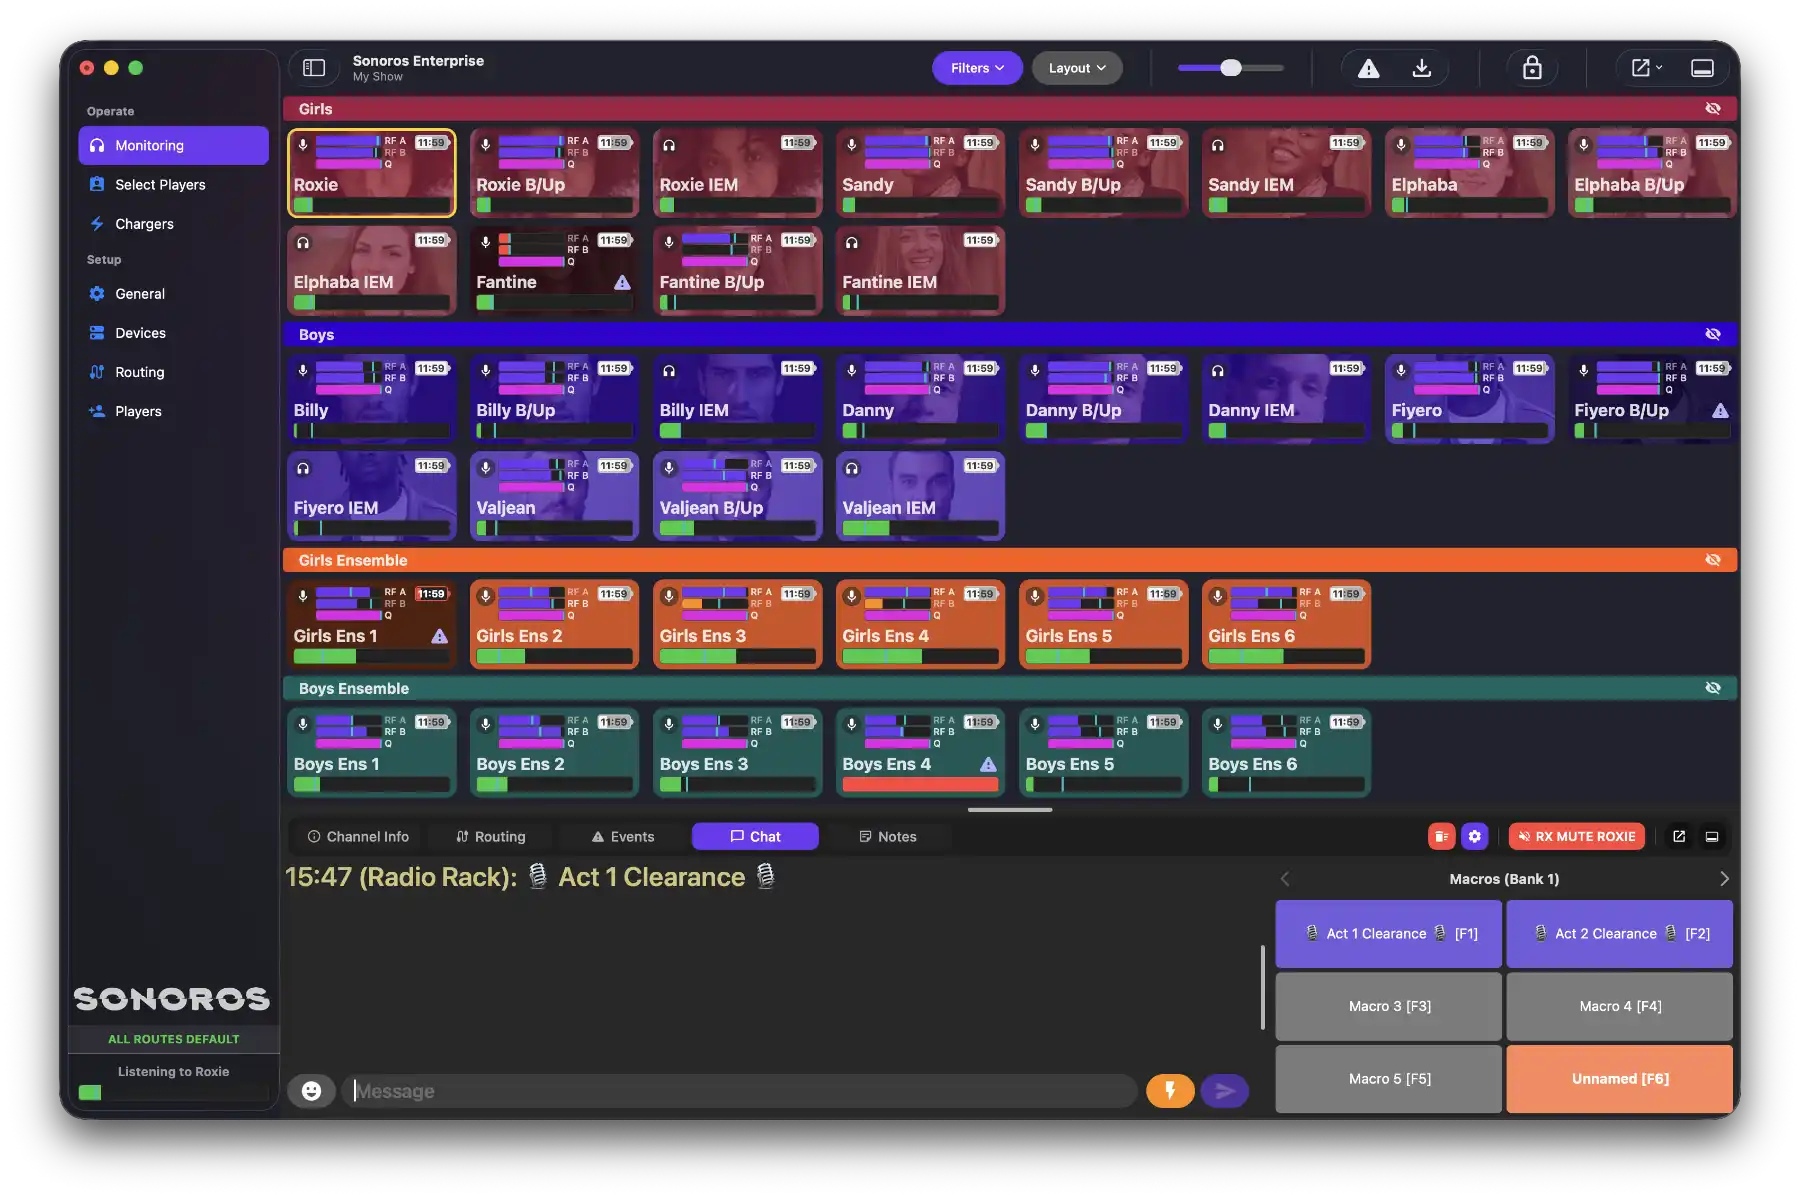
Chat lets the server and clients communicate during a show. When you send a message, it's delivered to all connected clients and appears in their chat view.
The chat view is in the inspector panel on the Monitoring tab.
Sending a message
Type in the message box and press Enter or the send button.
Flash
Click Flash to draw attention to the chat window on all clients. Use this to nudge someone to look at a message.
Pop out
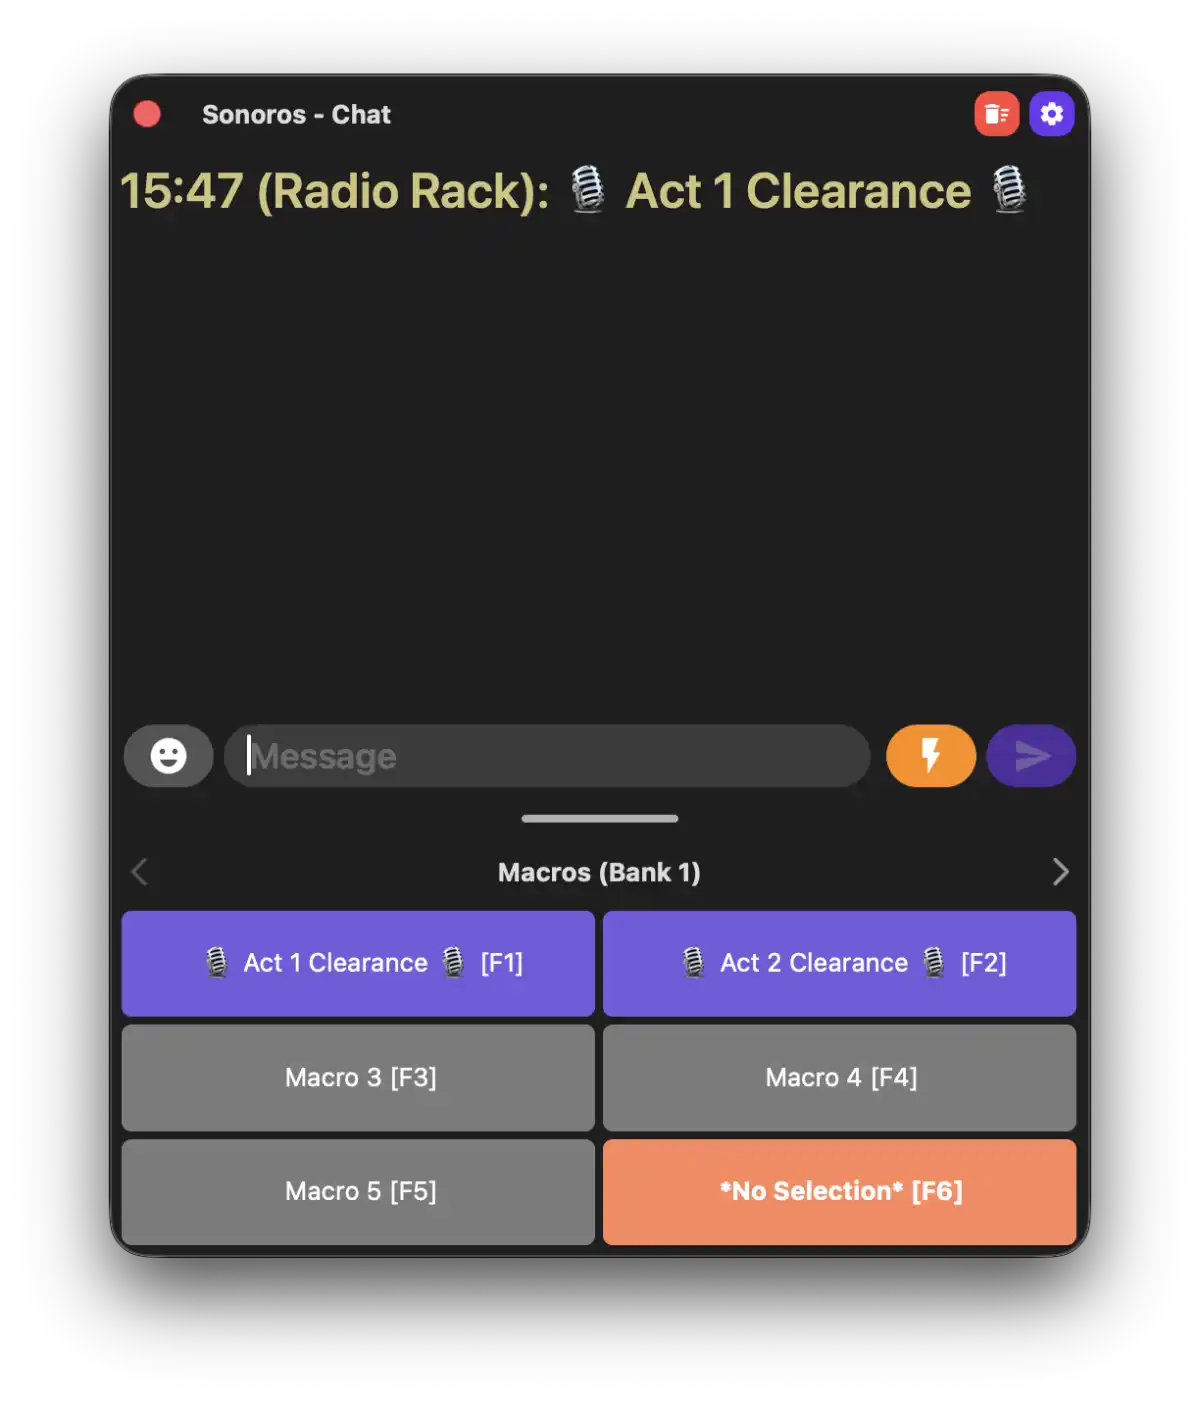
Click the Show Chat Window button to open chat in a separate window. You can resize and reposition it however you like. Click the button again to close it.
Clear chat
Click the clear button, or press F12, to clear your local chat history.

Macros
The chat window shows a row of macro buttons below the message history. Press F1 through F6 to send the corresponding macro from the current bank, or click a button directly.
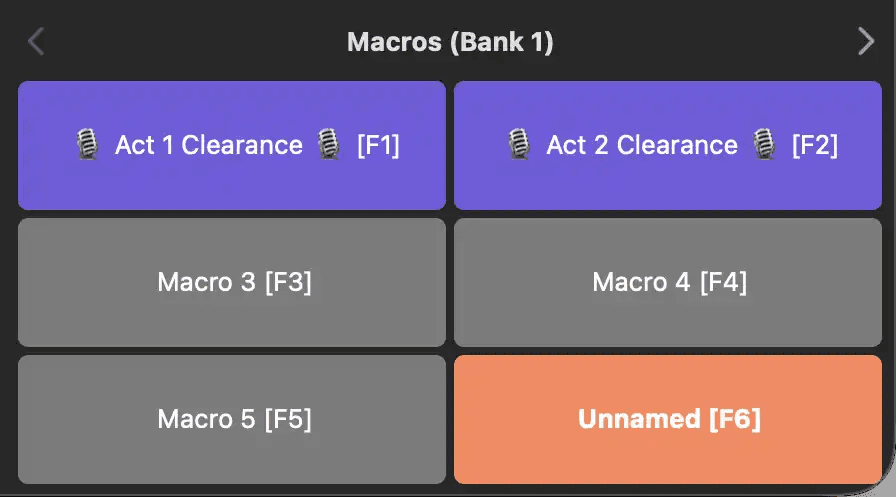
Use the arrow buttons to move between banks. The current bank is shown in the Macros (Bank X) label.
Clients can send macros but cannot edit them. Macros are set on the server.
Chat settings
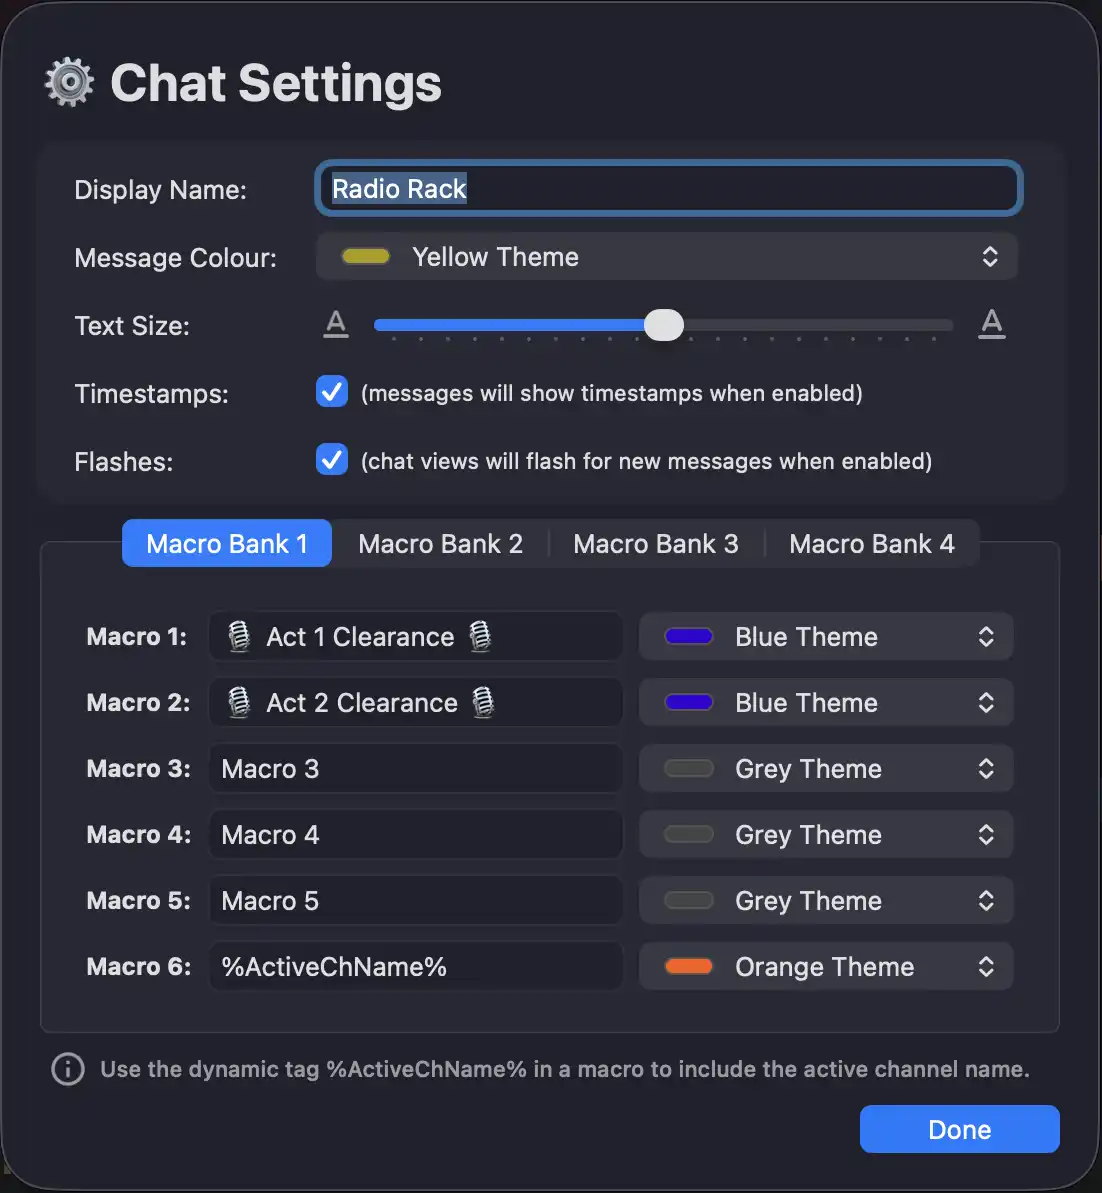
Click the gear icon to open chat settings.
Display Name: the name that appears alongside your messages. The server defaults to "Server" and clients default to "Client" if left blank.
Text Size: adjusts the text size in the chat view.
Timestamps: when enabled, messages show a timestamp.
Flashes: when enabled, the chat view flashes to notify you of new messages. Uncheck to disable.
Macros: the Banks tabs let you configure your macros. Each bank has six slots with a text field and a colour picker. Type %ActiveChName% in a message to substitute the name of the currently selected channel when the macro is sent. Macros that use this tag appear in bold.
OSC
You can send chat messages via OSC commands. See the OSC Setup and Command Reference article for details.
Chat lets the server and clients communicate during a show. When you send a message, it's delivered to all connected clients and appears in their chat view.
The chat view is in the inspector panel on the Monitoring tab.
Sending a message
Type in the message box and press Enter or the send button.
Flash
Click Flash to draw attention to the chat window on all clients. Use this to nudge someone to look at a message.
Pop out
Click the Show Chat Window button to open chat in a separate window. You can resize and reposition it however you like. Click the button again to close it.
Clear chat
Click the clear button, or press F12, to clear your local chat history.
Macros
The chat window shows a row of macro buttons below the message history. Press F1 through F6 to send the corresponding macro from the current bank, or click a button directly.
Use the arrow buttons to move between banks. The current bank is shown in the Macros (Bank X) label.
Clients can send macros but cannot edit them. Macros are set on the server.
Chat settings
Click the gear icon to open chat settings.
Display Name: the name that appears alongside your messages. The server defaults to "Server" and clients default to "Client" if left blank.
Text Size: adjusts the text size in the chat view.
Timestamps: when enabled, messages show a timestamp.
Flashes: when enabled, the chat view flashes to notify you of new messages. Uncheck to disable.
Macros: the Banks tabs let you configure your macros. Each bank has six slots with a text field and a colour picker. Type %ActiveChName% in a message to substitute the name of the currently selected channel when the macro is sent. Macros that use this tag appear in bold.
OSC
You can send chat messages via OSC commands. See the OSC Setup and Command Reference article for details.