
Wiki
Wiki
Set Up Your Show
Set Up Your Show
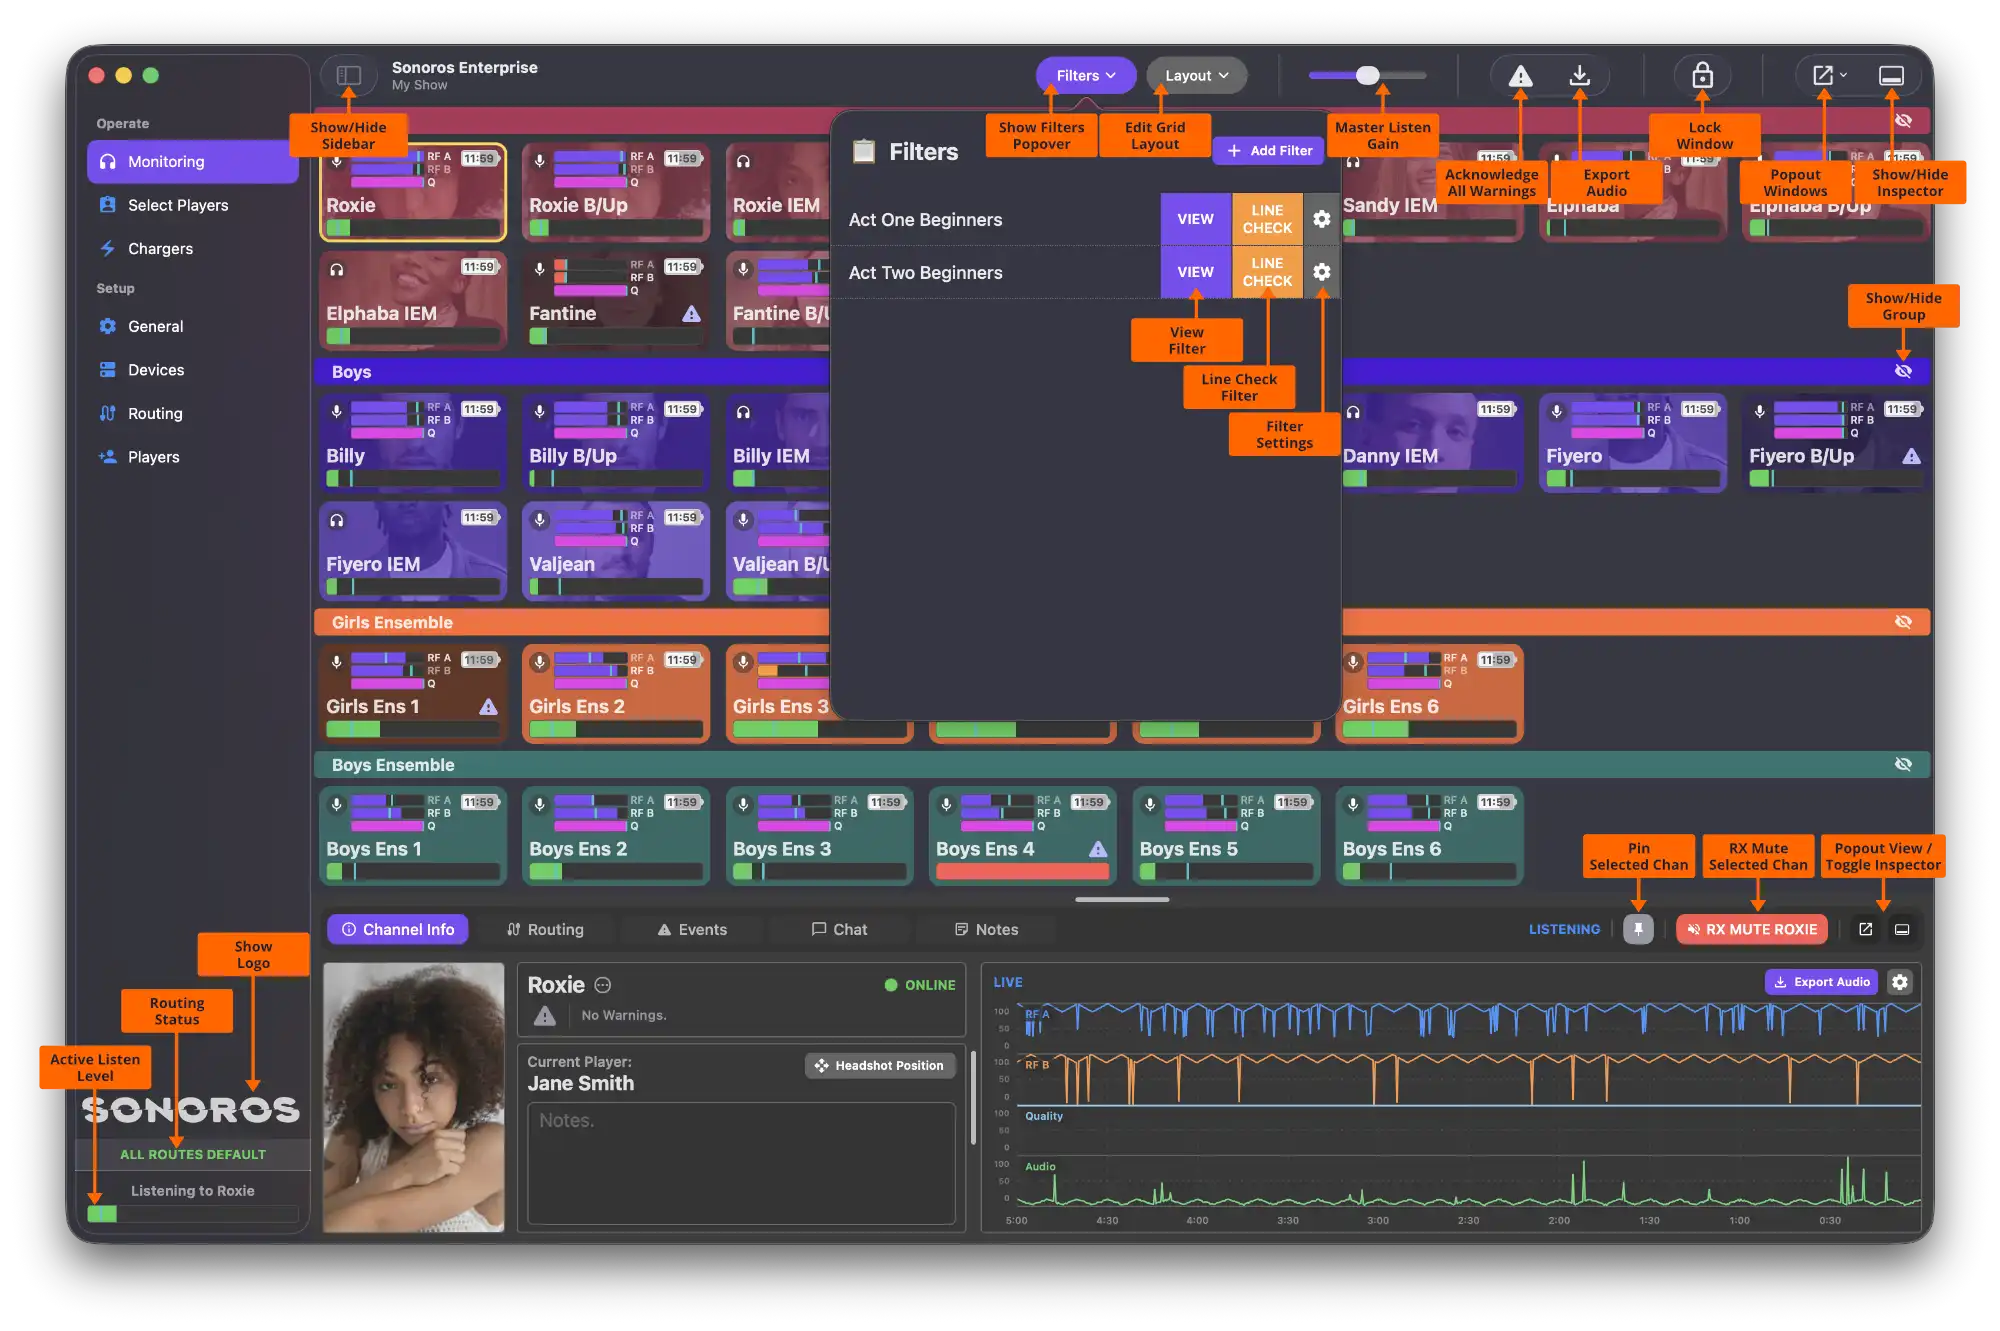
This article walks you through getting a basic Sonoros system up and running from scratch. By the end you should have audio monitoring, RF visibility, and a connected client.
1. Create your show
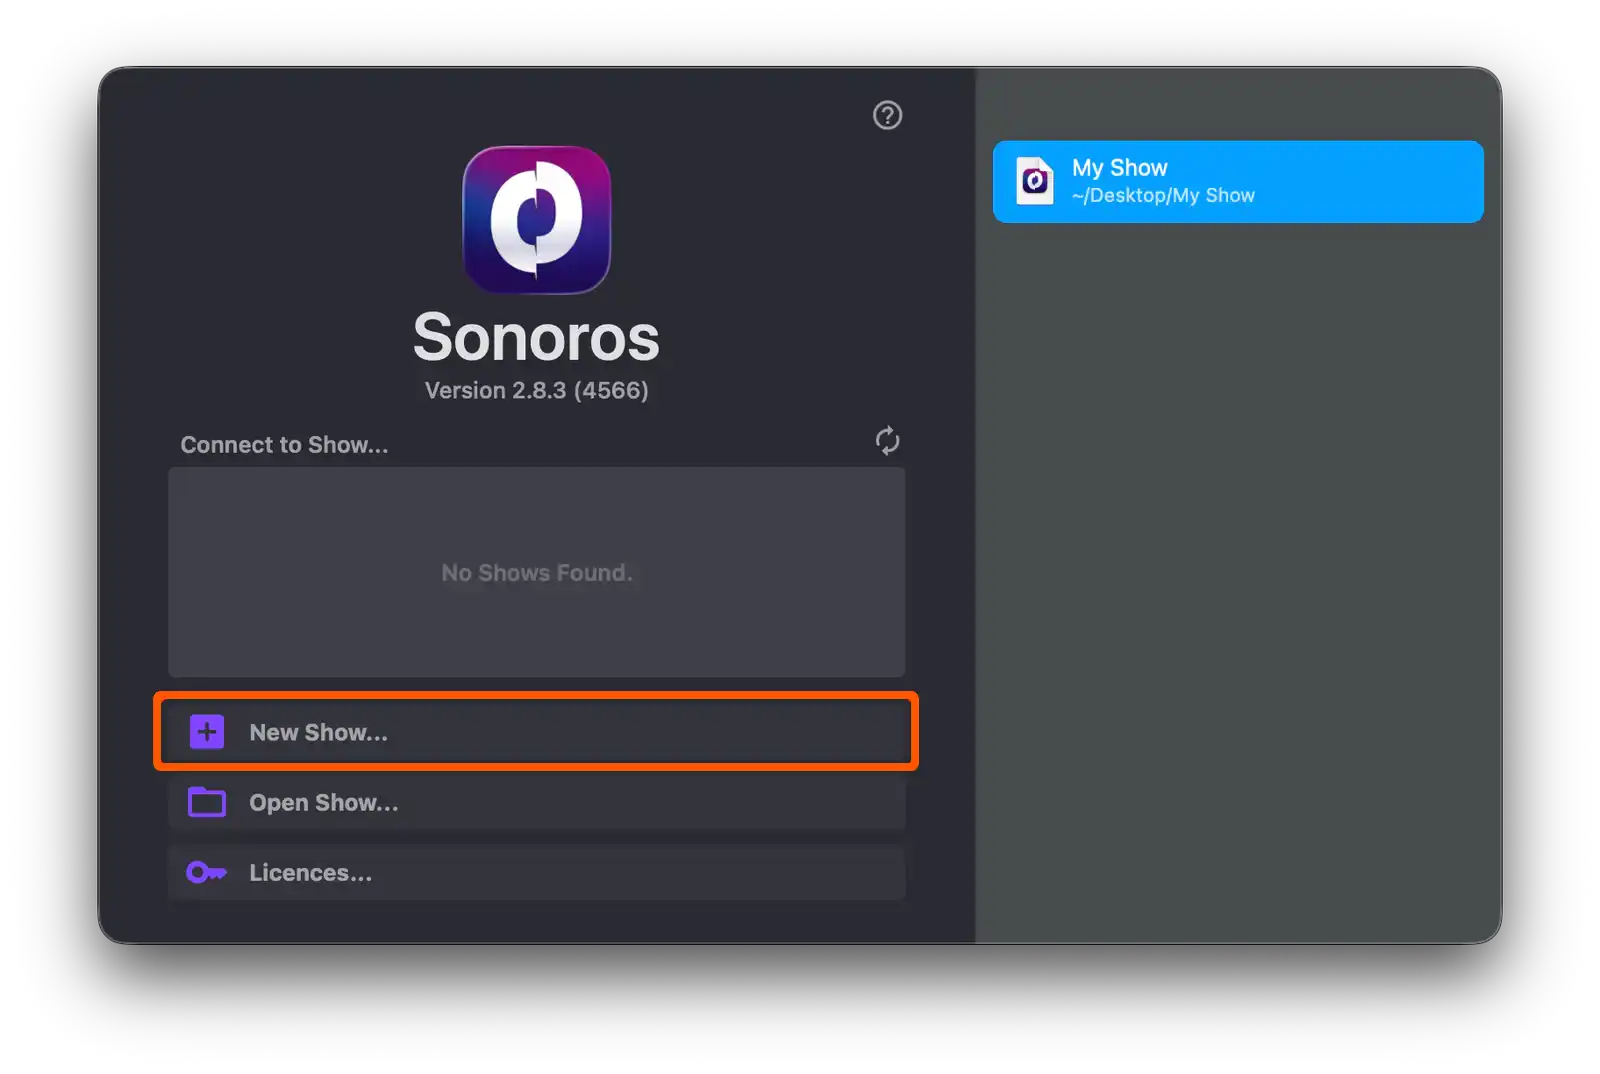
Open Sonoros. From the splash screen, click New Show. Sonoros opens on the Monitoring tab.
2. Set up audio
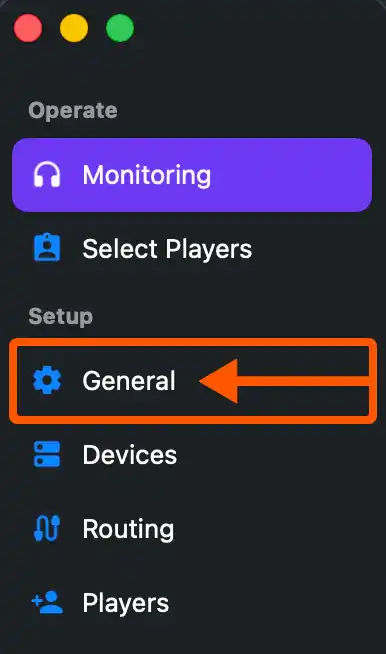
Open Setup > General from the sidebar and scroll to Audio Monitoring Settings.
Set your Input Device and Output Device. These are standard macOS audio devices, so anything your system can see — a Dante Virtual Soundcard, a MADIface, or a built-in interface — will appear here. Click Apply when done.

Note: macOS may ask for microphone permission the first time Sonoros ingests audio. Grant it when prompted. If you missed the prompt, click Request Permissions in Setup > General, or grant it manually in System Settings > Privacy & Security > Microphone.
Return to the Monitoring tab.
3. Add your devices
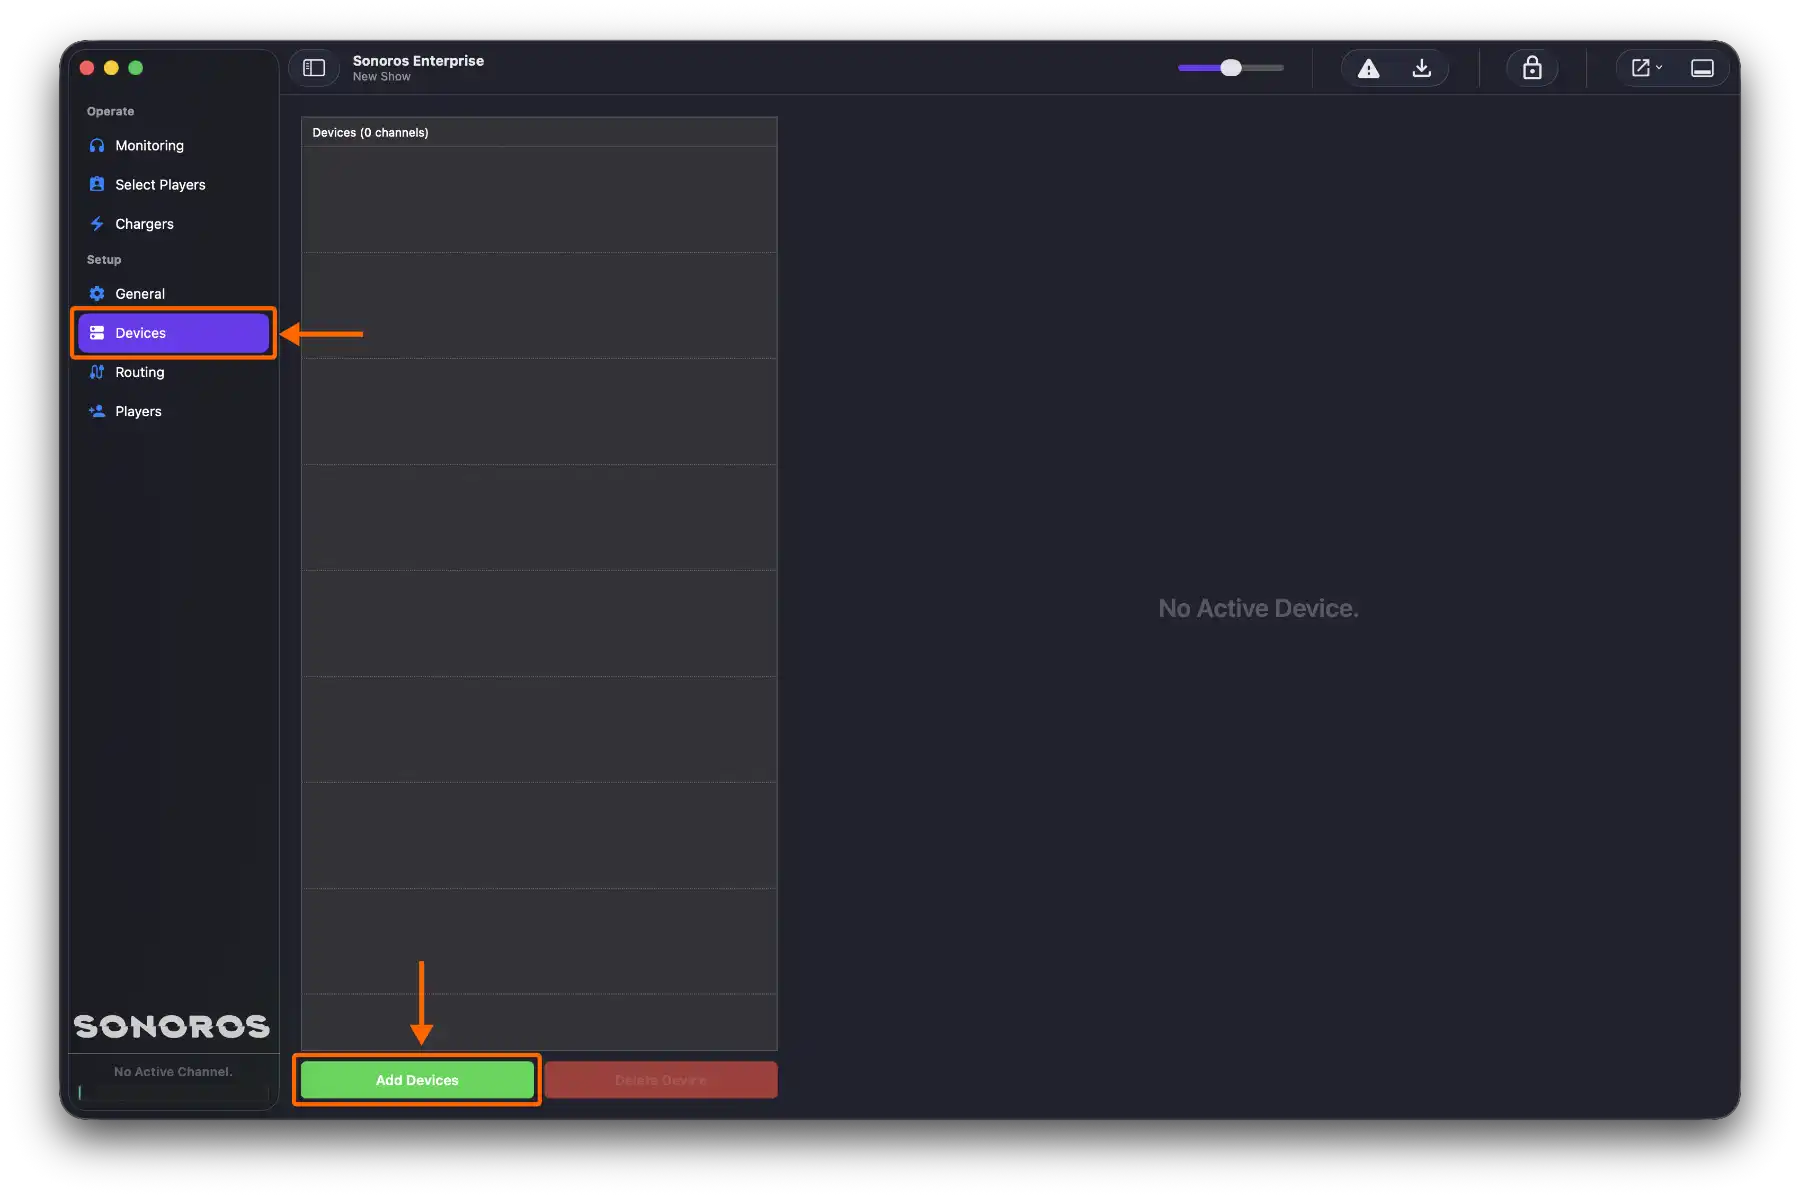
From the Monitoring tab, click Add Devices, or open Setup > Devices from the sidebar. This takes you to the Devices tab. Click Add Devices again to open the Add Devices popup.
In the popup, set the device type, the number of devices you want to add, and the IP address of the first device. If you're adding more than one, the IP Step field will automatically increment the IP for each additional device.
Tick Set Audio Monitoring Channel and select the channel — this is the Core Audio input channel on your Mac that's receiving audio from this device. This is what Sonoros will play when you click the channel ticket.
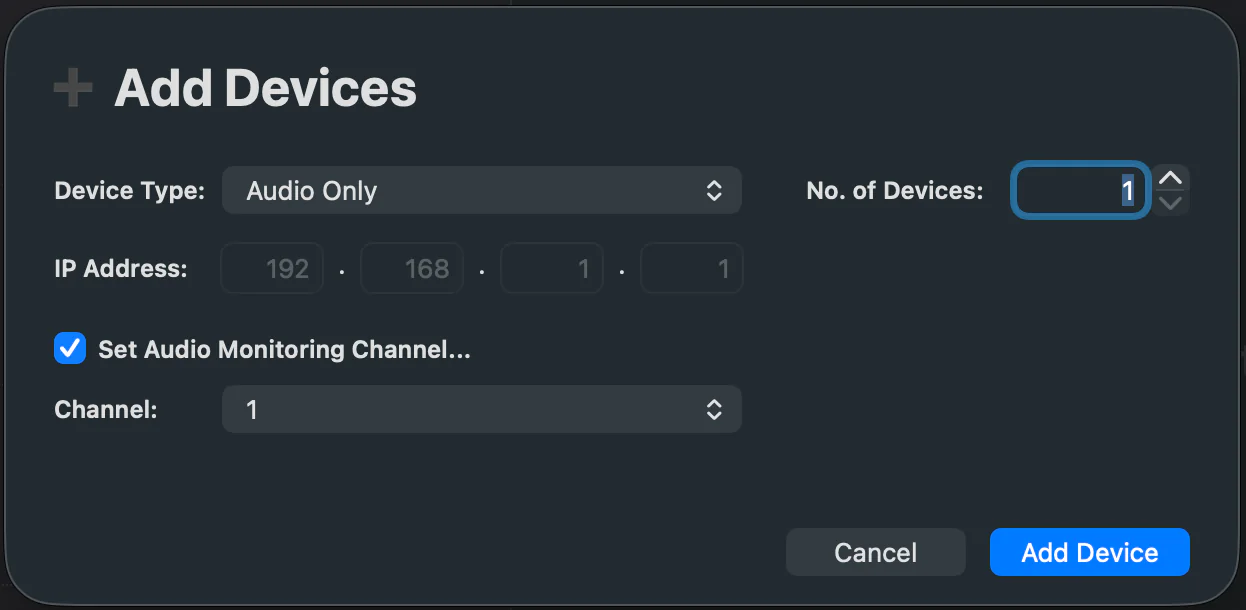
Click Add Device. Sonoros returns you to the Devices tab, where your devices will appear. If all is well, their status indicator will show as Online.
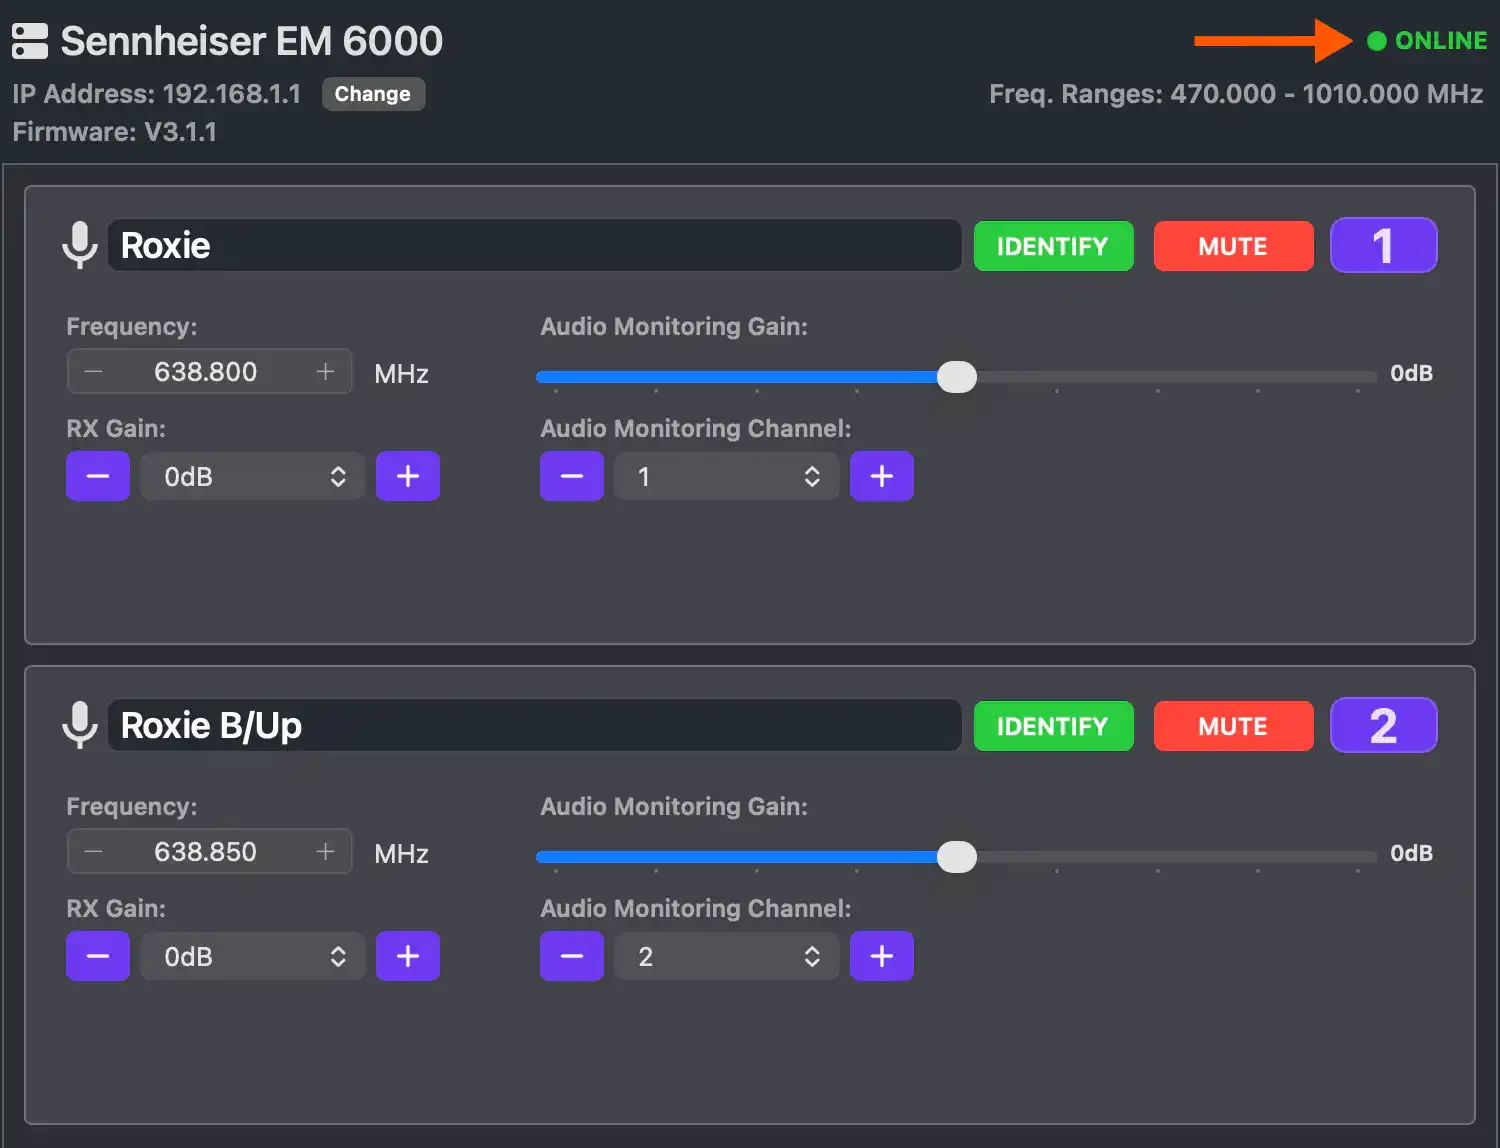
You can view and modify device parameters — frequency, gain, and so on — directly from this tab for most supported devices.
Note: If you're using Sennheiser Spectera receivers, there are a few extra setup steps. See Sennheiser Spectera Setup before continuing.
Note: Sony devices are supported in read-only mode. You can monitor them in Sonoros but cannot edit their settings from within the app.
If a device isn't coming online, see Troubleshooting Audio and Network.
Note: If you need to modify the Audio Monitoring Channel of a device, you can do so in the Devices tab, or modify multiple devices in the Routing tab.
4. Monitor your channels
Switch to the Monitoring tab. Your devices will appear as channel tickets with live RF data and audio metering.
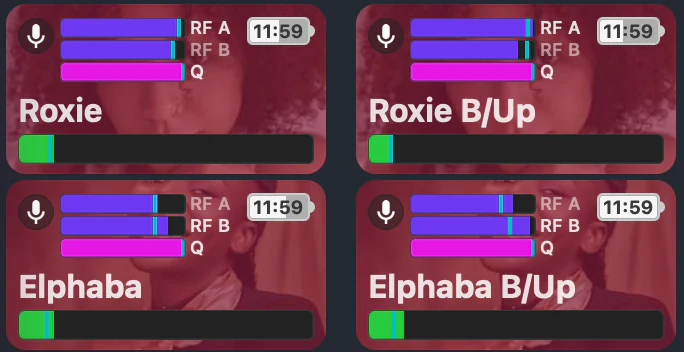
Click any ticket to start listening to that channel's audio.
Tip: To stop listening, click Listening To... in the sidebar from anywhere in the app.
5. Adjust the grid zoom
If you want to fit more or fewer channel tickets on screen, open the Layout dropdown and select Edit Layout.
The Grid Zoom popup appears above the monitoring grid. Use the decrease and increase buttons to adjust the size of the channel tickets. The grid updates immediately, and the popup shows the current zoom percentage.
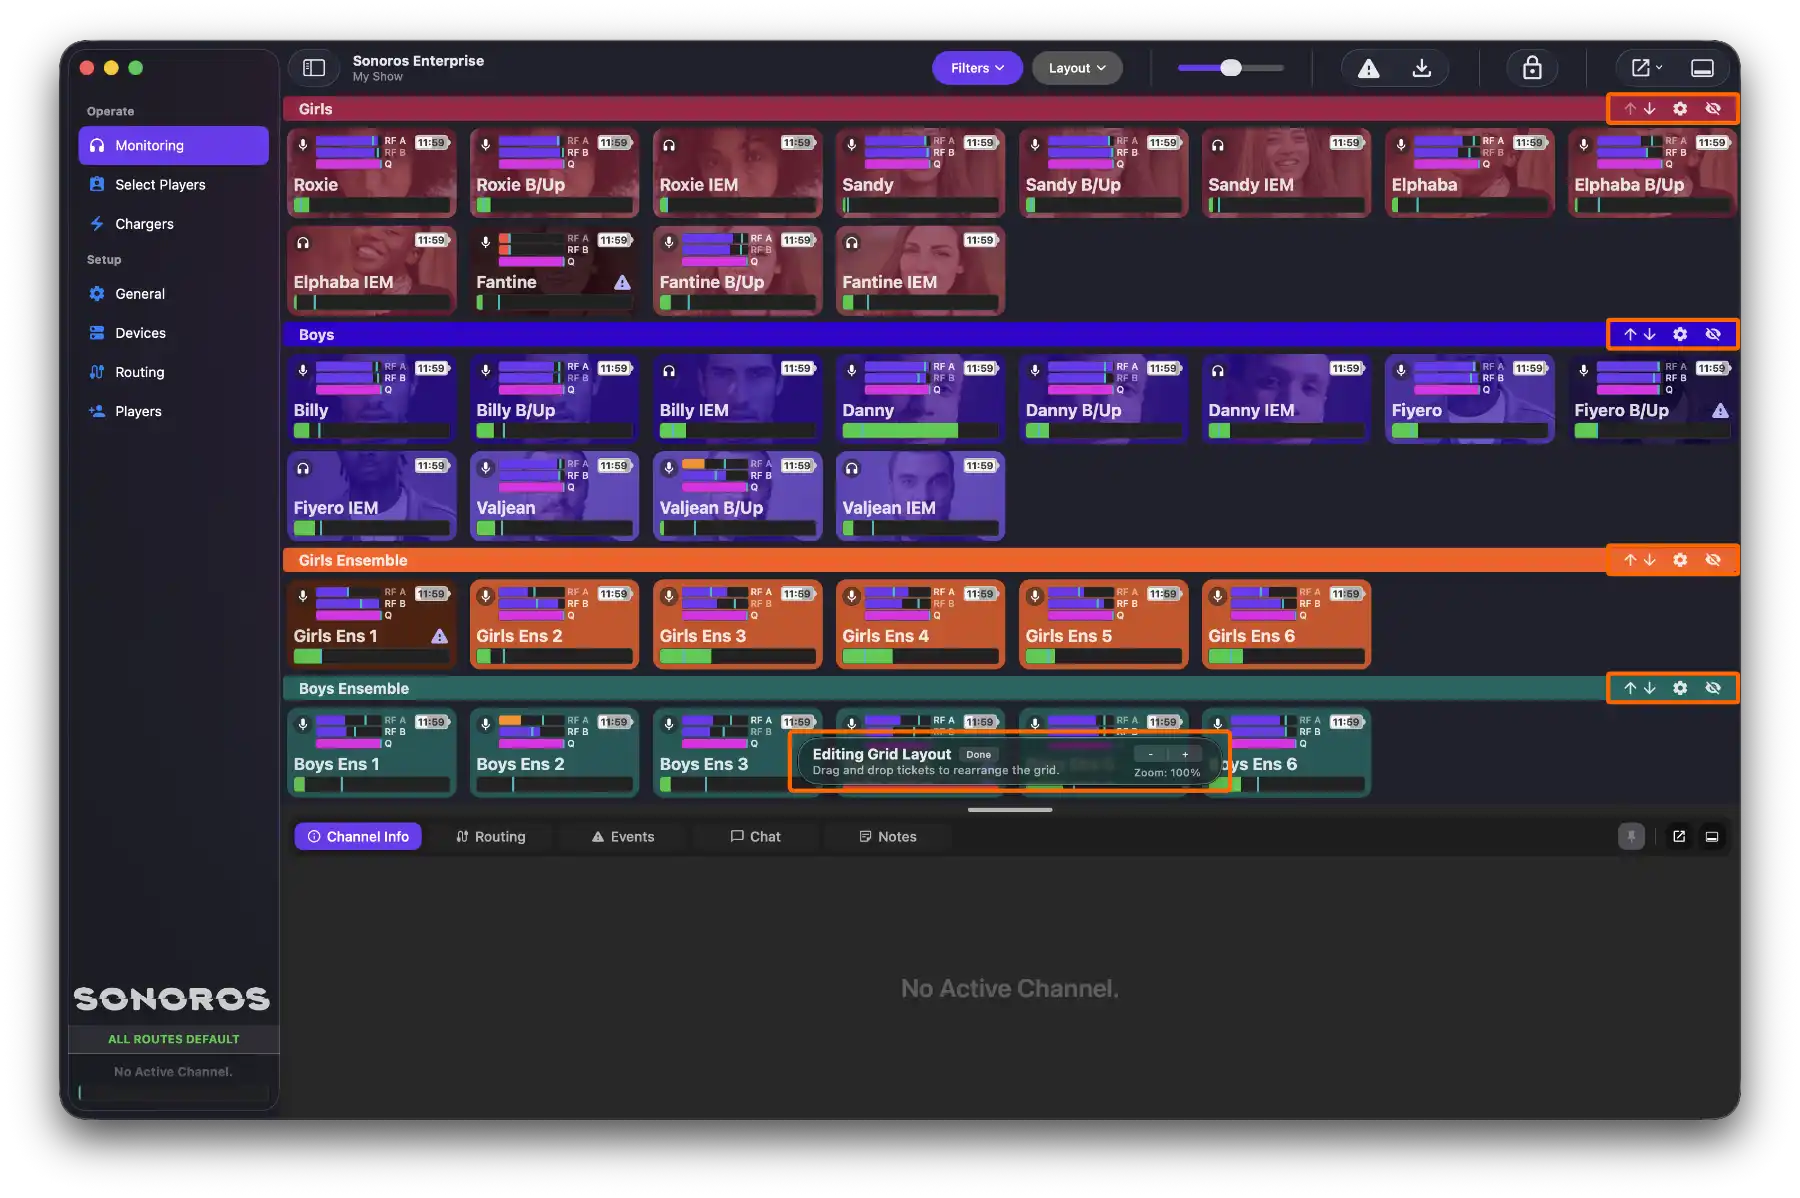
When you are happy with the layout, click Done in the popup, or select Layout > Finish Editing Layout.
6. Scrub audio history
Drag on the Audio History to scrub back through recent audio on any channel. This is covered in depth in Audio History, Scrubbing, and Export.
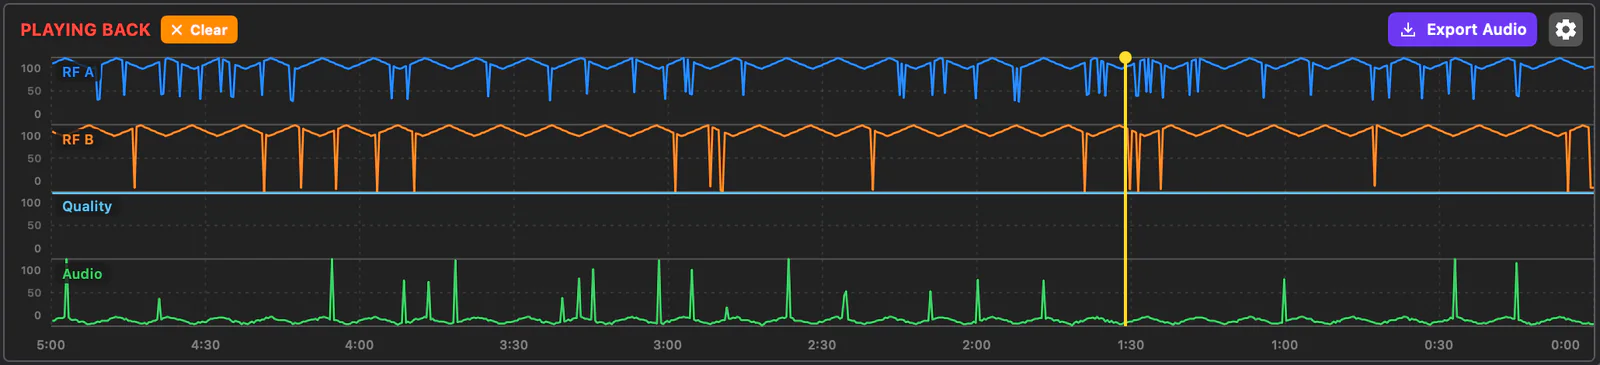
Tip: You can source audio history from the Audio Monitoring Device rather than the RF device using "RF Device Audio Meter Source:" in Setup > General.
7. Connect a client
On a second Mac or an iPhone or iPad on the same network, open Sonoros. The splash screen will show your show in the Connect to Show list. Double-click it to connect.
The client opens into a read-only view of your show — the same channel data, metering, and audio the server sees. Have a go at scrubbing audio over Wi-Fi, it's fun!
8. Send a test chat
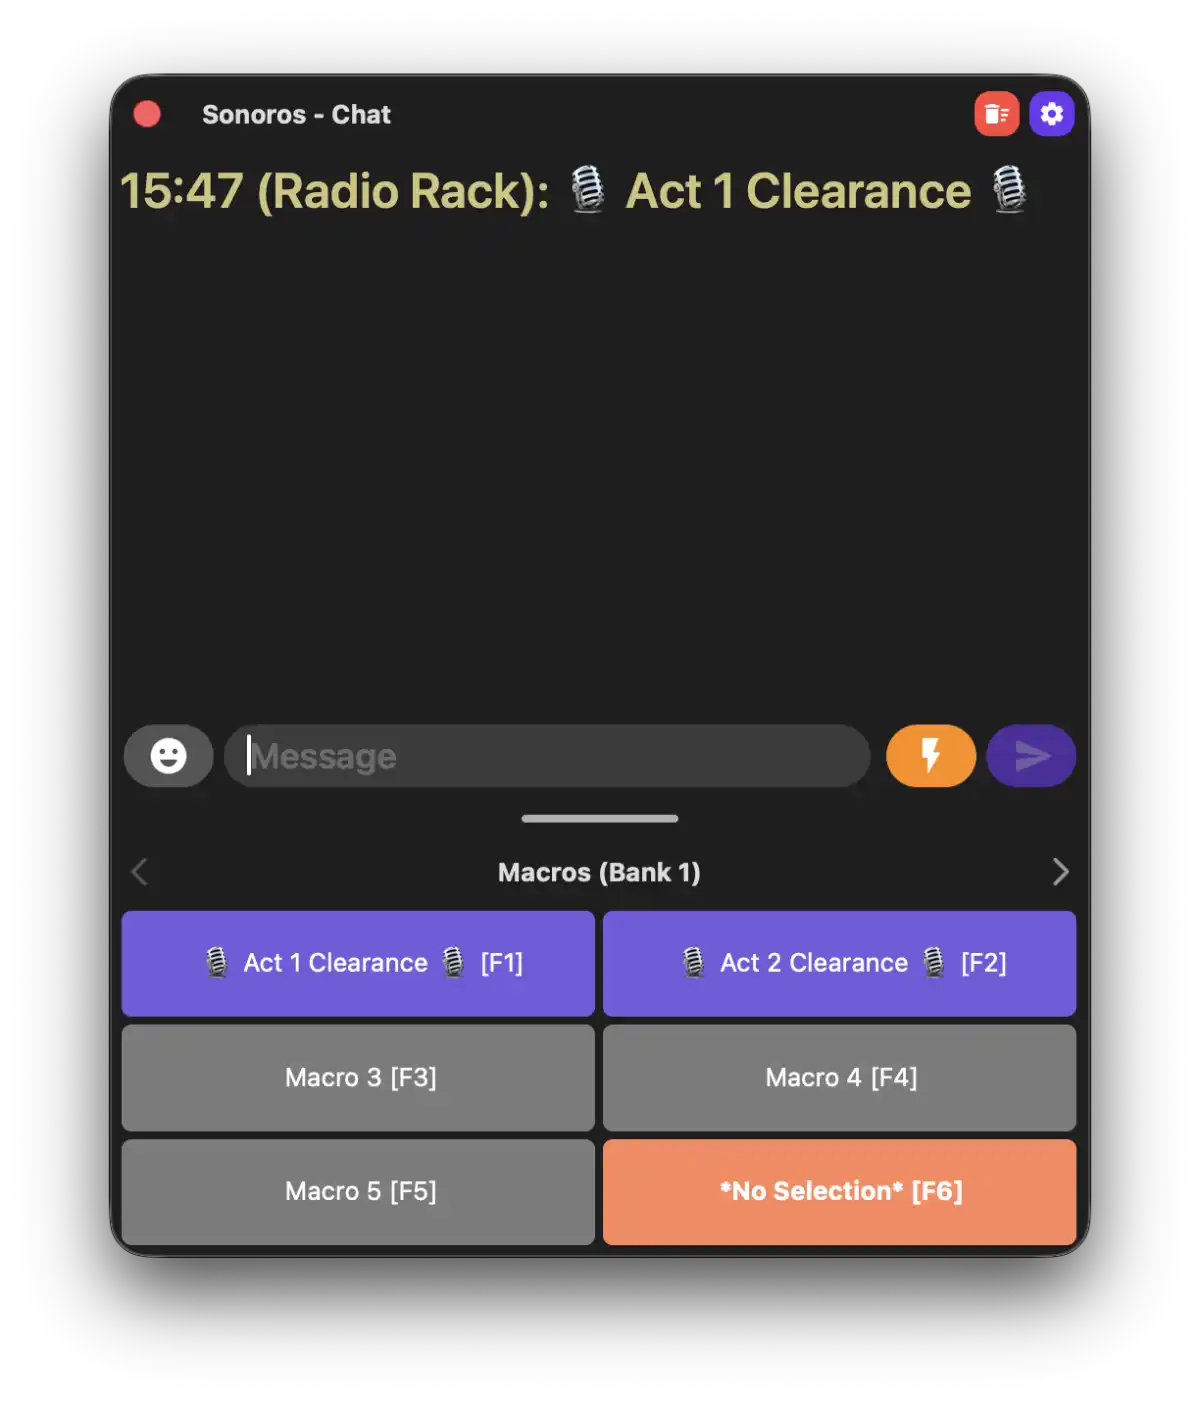
In the client, open the chat panel and send a message. Confirm it appears on the server.
9. Add your show logo
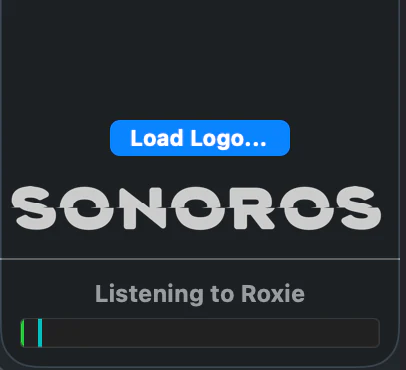
Hover over the Sonoros logo in the bottom left corner of the main window. A Load Logo button will appear. Click it, select your file, and it becomes your show logo.
10. Basic troubleshooting
Devices aren't coming online
Check that Sonoros and your receivers are on the same subnet. Try pinging a receiver's IP address from your Mac to confirm basic connectivity.
No audio metering
Check the Audio Monitoring Channel assignment from step 3 and confirm your input device is receiving signal. Check that macOS has granted Sonoros microphone permission.
Client can't find the show
Make sure the client is on the same network as the server. Firewalls and managed network switches can block discovery traffic — try a direct connection or a simpler network to confirm.
Audio permissions prompt didn't appear
Click Request Permissions in Setup > General, or enable Sonoros manually in System Settings > Privacy & Security > Microphone.
This article walks you through getting a basic Sonoros system up and running from scratch. By the end you should have audio monitoring, RF visibility, and a connected client.
1. Create your show
Open Sonoros. From the splash screen, click New Show. Sonoros opens on the Monitoring tab.
2. Set up audio
Open Setup > General from the sidebar and scroll to Audio Monitoring Settings.
Set your Input Device and Output Device. These are standard macOS audio devices, so anything your system can see — a Dante Virtual Soundcard, a MADIface, or a built-in interface — will appear here. Click Apply when done.
Note: macOS may ask for microphone permission the first time Sonoros ingests audio. Grant it when prompted. If you missed the prompt, click Request Permissions in Setup > General, or grant it manually in System Settings > Privacy & Security > Microphone.
Return to the Monitoring tab.
3. Add your devices
From the Monitoring tab, click Add Devices, or open Setup > Devices from the sidebar. This takes you to the Devices tab. Click Add Devices again to open the Add Devices popup.
In the popup, set the device type, the number of devices you want to add, and the IP address of the first device. If you're adding more than one, the IP Step field will automatically increment the IP for each additional device.
Tick Set Audio Monitoring Channel and select the channel — this is the Core Audio input channel on your Mac that's receiving audio from this device. This is what Sonoros will play when you click the channel ticket.
Click Add Device. Sonoros returns you to the Devices tab, where your devices will appear. If all is well, their status indicator will show as Online.
You can view and modify device parameters — frequency, gain, and so on — directly from this tab for most supported devices.
Note: If you're using Sennheiser Spectera receivers, there are a few extra setup steps. See Sennheiser Spectera Setup before continuing.
Note: Sony devices are supported in read-only mode. You can monitor them in Sonoros but cannot edit their settings from within the app.
If a device isn't coming online, see Troubleshooting Audio and Network.
Note: If you need to modify the Audio Monitoring Channel of a device, you can do so in the Devices tab, or modify multiple devices in the Routing tab.
4. Monitor your channels
Switch to the Monitoring tab. Your devices will appear as channel tickets with live RF data and audio metering.
Click any ticket to start listening to that channel's audio.
Tip: To stop listening, click Listening To... in the sidebar from anywhere in the app.
5. Adjust the grid zoom
If you want to fit more or fewer channel tickets on screen, open the Layout dropdown and select Edit Layout.
The Grid Zoom popup appears above the monitoring grid. Use the decrease and increase buttons to adjust the size of the channel tickets. The grid updates immediately, and the popup shows the current zoom percentage.
When you are happy with the layout, click Done in the popup, or select Layout > Finish Editing Layout.
6. Scrub audio history
Drag on the Audio History to scrub back through recent audio on any channel. This is covered in depth in Audio History, Scrubbing, and Export.
Tip: You can source audio history from the Audio Monitoring Device rather than the RF device using "RF Device Audio Meter Source:" in Setup > General.
7. Connect a client
On a second Mac or an iPhone or iPad on the same network, open Sonoros. The splash screen will show your show in the Connect to Show list. Double-click it to connect.
The client opens into a read-only view of your show — the same channel data, metering, and audio the server sees. Have a go at scrubbing audio over Wi-Fi, it's fun!
8. Send a test chat
In the client, open the chat panel and send a message. Confirm it appears on the server.
9. Add your show logo
Hover over the Sonoros logo in the bottom left corner of the main window. A Load Logo button will appear. Click it, select your file, and it becomes your show logo.
10. Basic troubleshooting
Devices aren't coming online
Check that Sonoros and your receivers are on the same subnet. Try pinging a receiver's IP address from your Mac to confirm basic connectivity.
No audio metering
Check the Audio Monitoring Channel assignment from step 3 and confirm your input device is receiving signal. Check that macOS has granted Sonoros microphone permission.
Client can't find the show
Make sure the client is on the same network as the server. Firewalls and managed network switches can block discovery traffic — try a direct connection or a simpler network to confirm.
Audio permissions prompt didn't appear
Click Request Permissions in Setup > General, or enable Sonoros manually in System Settings > Privacy & Security > Microphone.